Admin App User Manual
- Introduction
- Dashboard
- Service Location Management
- Geofencing & Pricing
- Users Management
- Trip Requests Management
- Promo Management
- Custom Notifications
- Cancellation & complaints
- Reports
- Configurations
Introduction
Tagxi is a taxi ride hailing based system that provides services such as Transportation and Ride Sharing system. Tagxi provides client with all the much needed service like transportation, booking different kinds of vehicles, booking parameters and booking details. our application supports multiple currency and multiple timezone, so you can launch this application world wide. And tagxi supports multilingual as well. you can also customise the localisation contents through translation option in our admin app.
Major Modules are
- Dashboard
- Service Location Management
- Geofencing & Pricing
- Admin,Driver & Users Management
- Trip Requests Management
- Promo Management
- Custom Notifications
- Cancellation & complaints
- Reports
- FAQ & SOS
- System settings
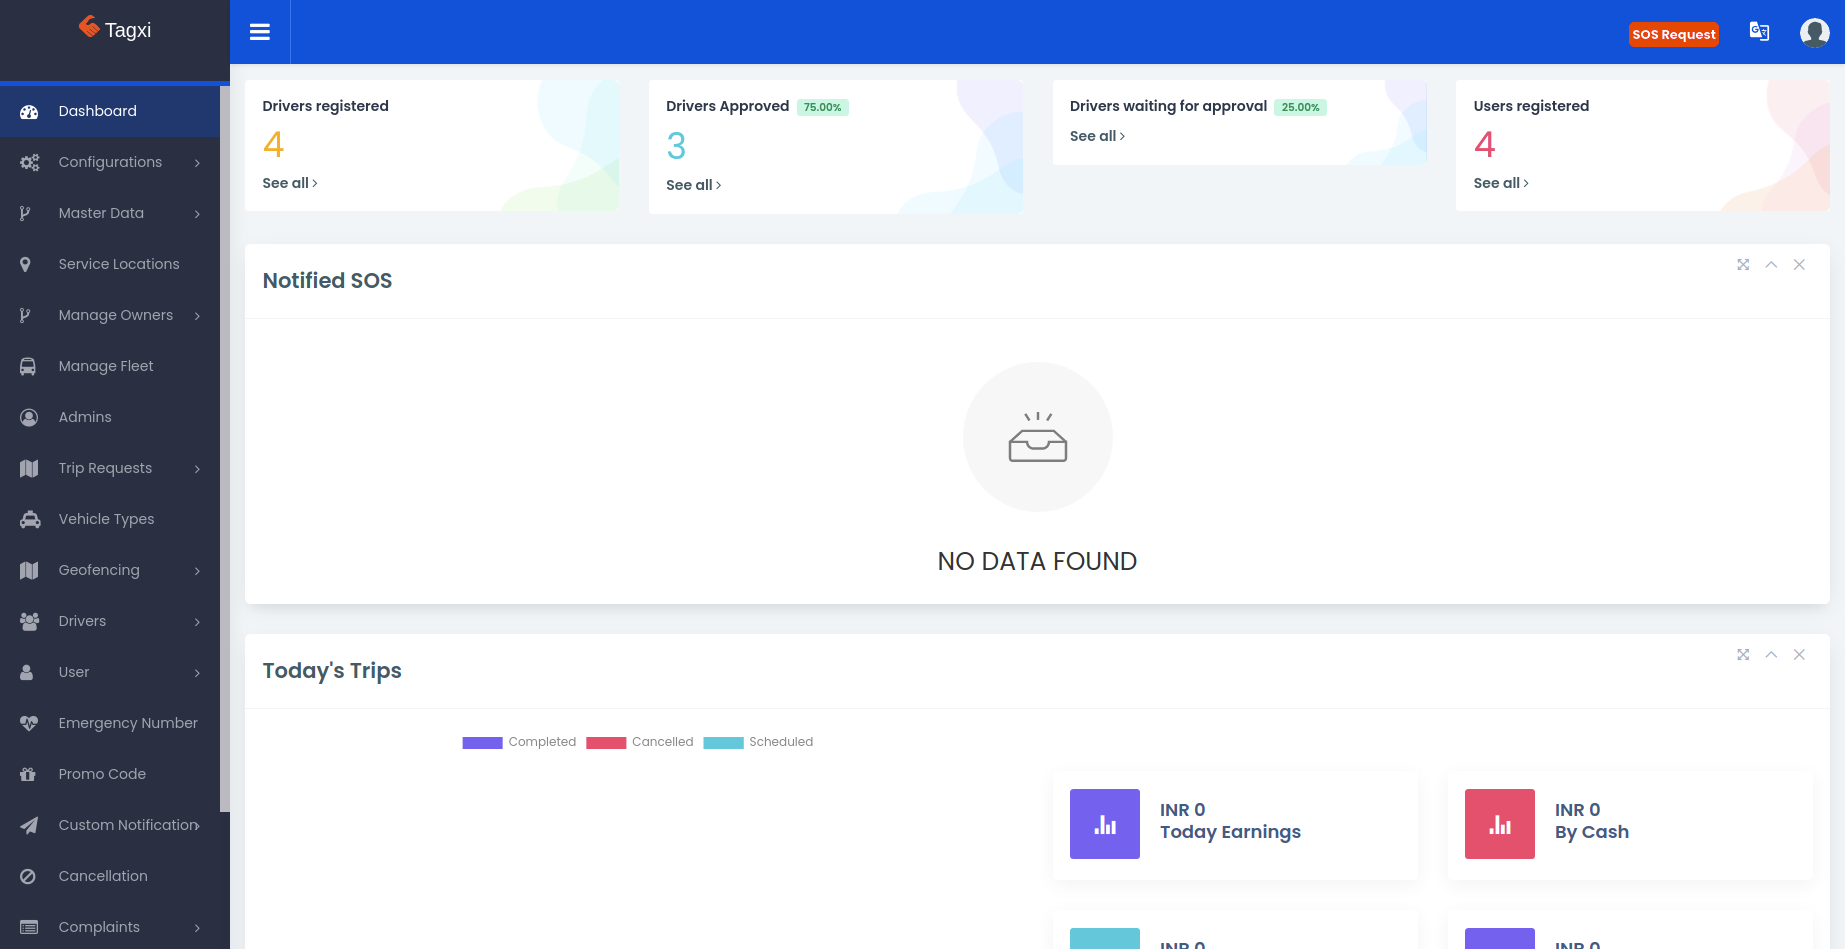
Dashboard
Dashboard which helps to manage your whole application there you can see how many users & drivers. trip overview & Earnings overview of the current year.
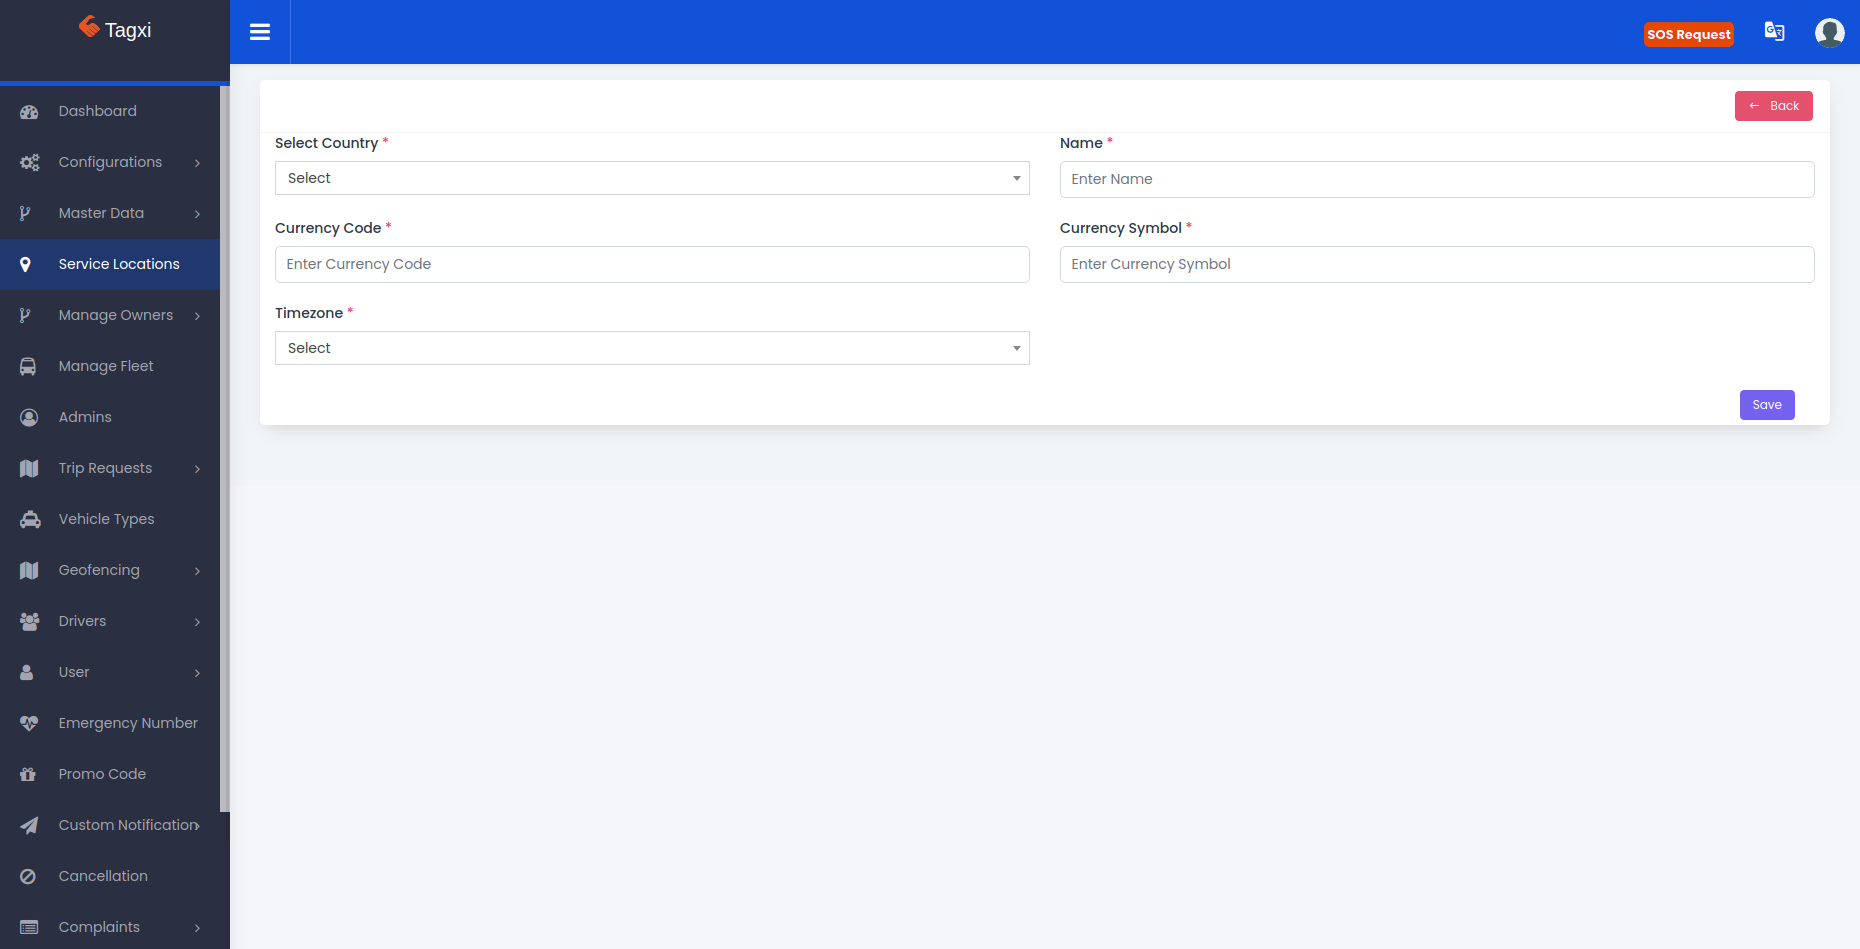
Service Location Management
Service location represents the area of your service. that is where the service is going to launch. you can restrict the users by setting the service lcoation. only the service available area's users could be used our application other users cannot use our application.
You can set unique currency & timzone for each service location. so that you can launch our application world wide.
please refer the following image to create a service location.
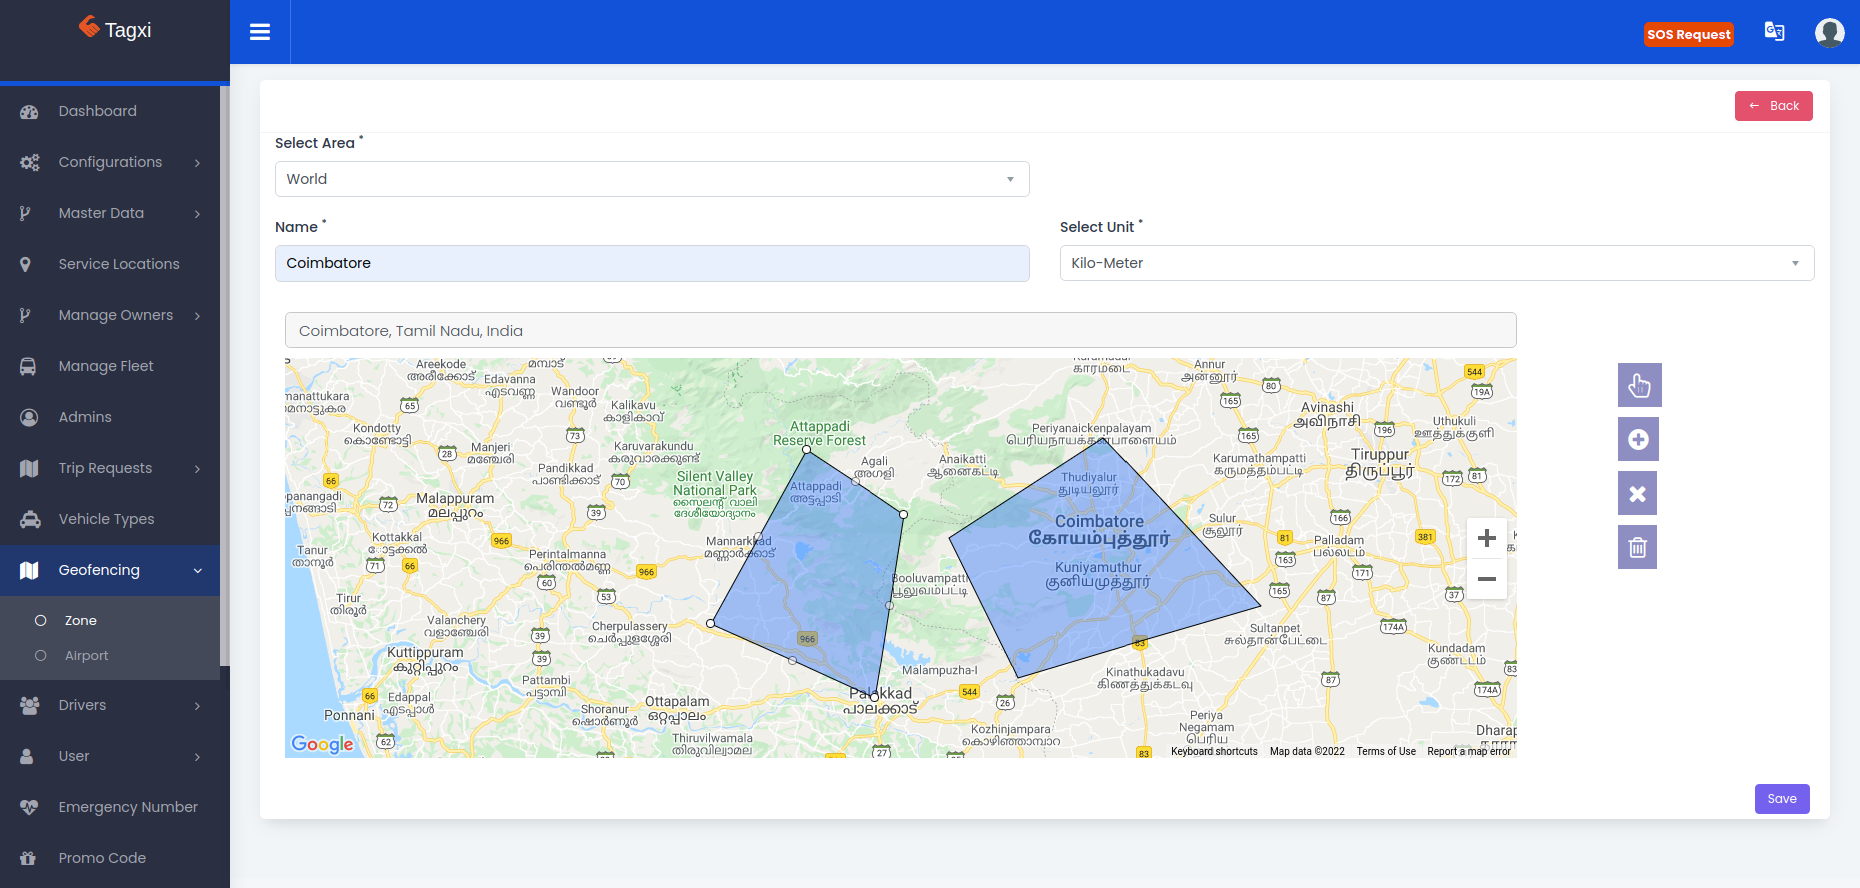
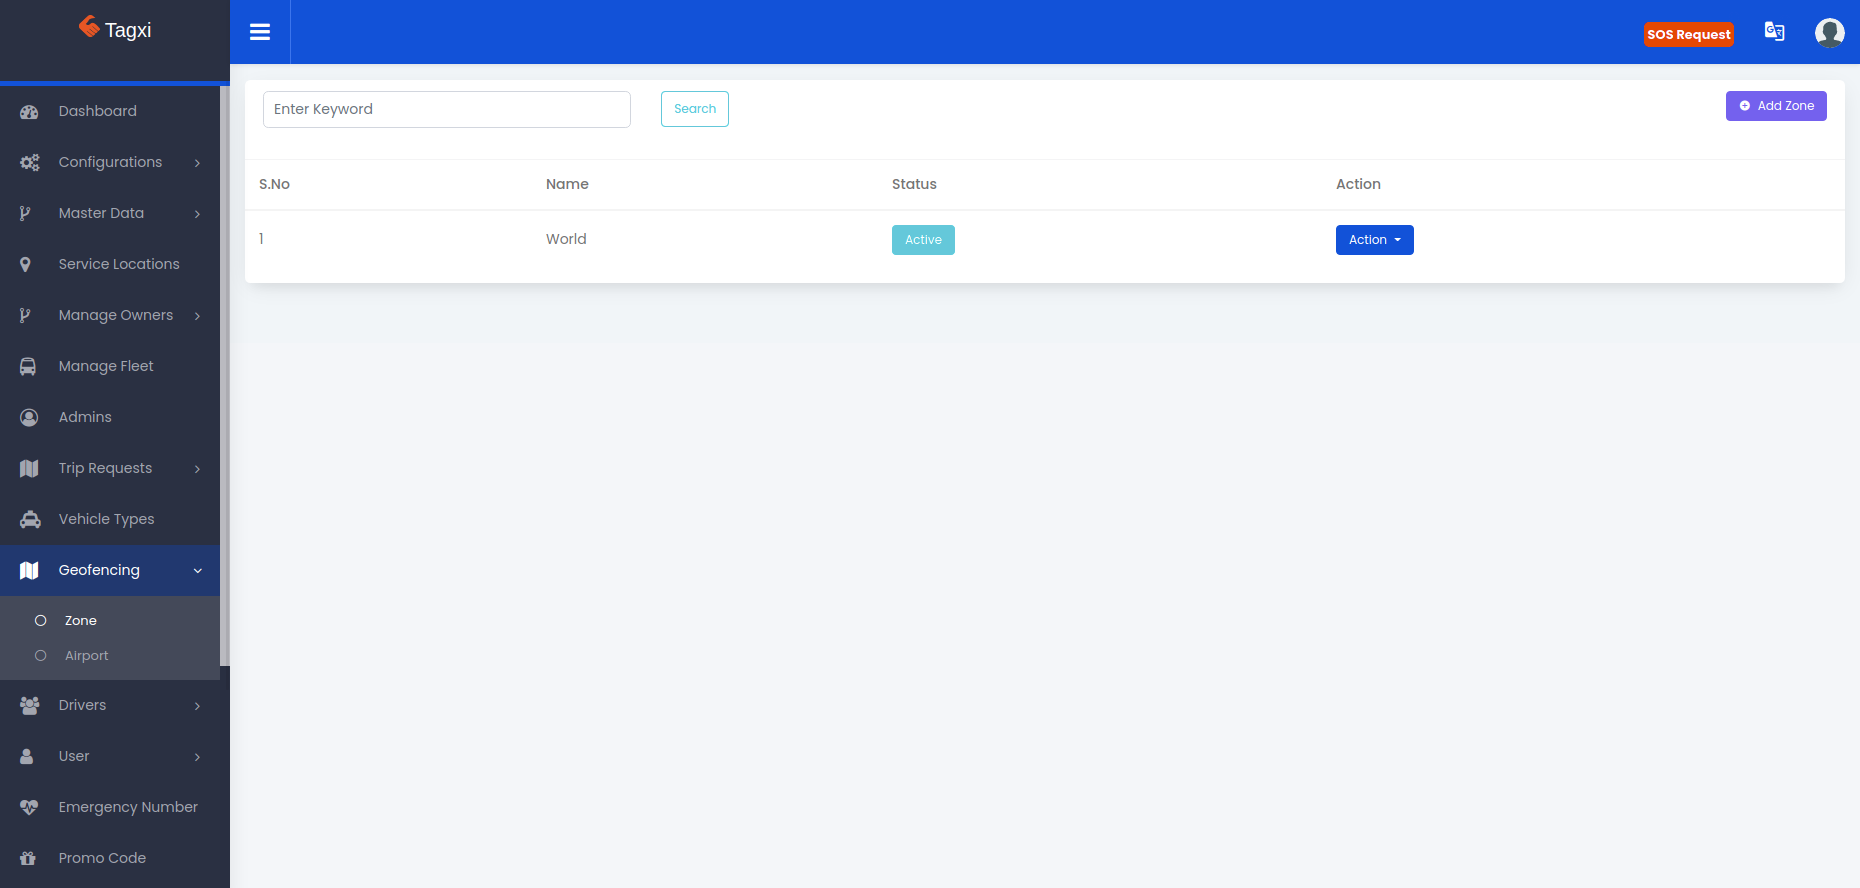
Geofencing & Pricing
Geofencing which helps to create a zone in service location. you can draw multiple zone as polygon on a map in each service location. only the polygon contains area's could be use our application, other area will resemble that is service not available at this location.
While creating a zone you can set the units for each zone. unit is for the trip requests distance should be calculated as kilometers or miles. you can configure different units for each zone.
Here we are providing an Edit & zone map view options as well, by using these option you can see the drawn zone and also you can edit the coordinates for each zone at any time.
Please refer the following image to create a zone
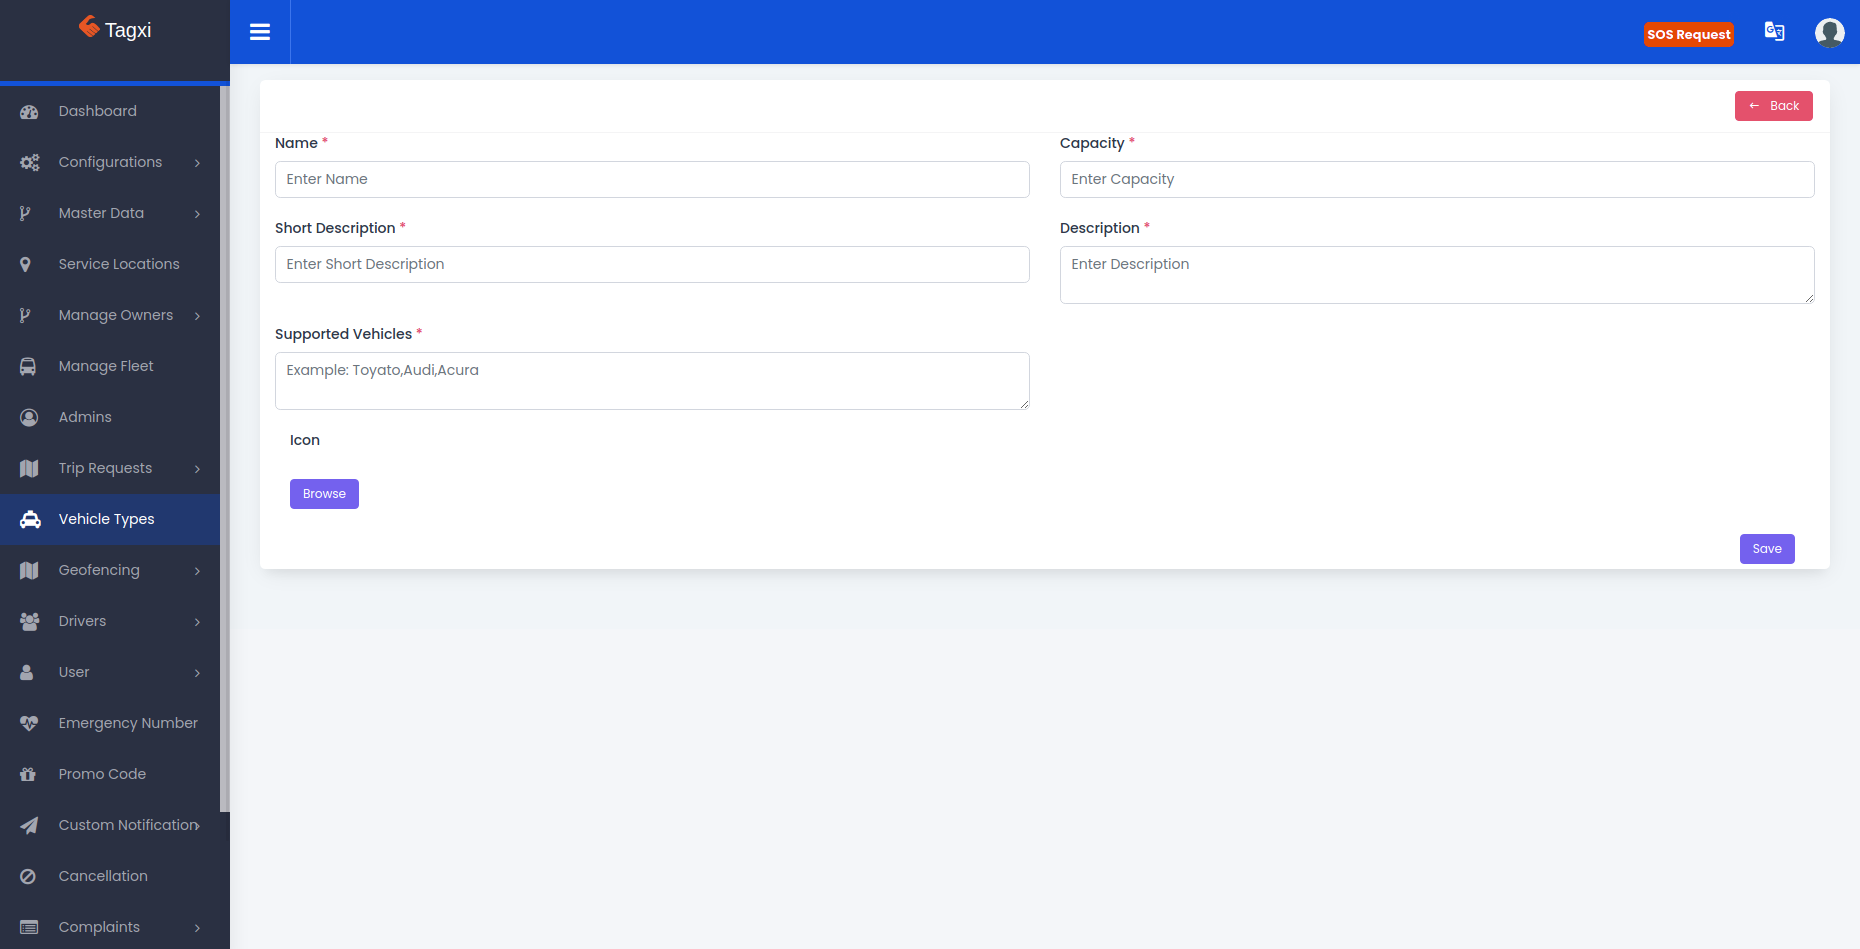
Before Getting in to the Pricing we need to create a Vehicle types for the system. please refer the below image to create a vehicle types.

Assign Type along with pricing
After createing the vehicle types & zone we need to assign the vehicle types for each zone.
while assign the vehicle type to the particular zone you can also set some configurations like if you want to allow only cash trip in a particular zone you can choose payment types as only cash. you can set three options i.e cash,card,wallet.


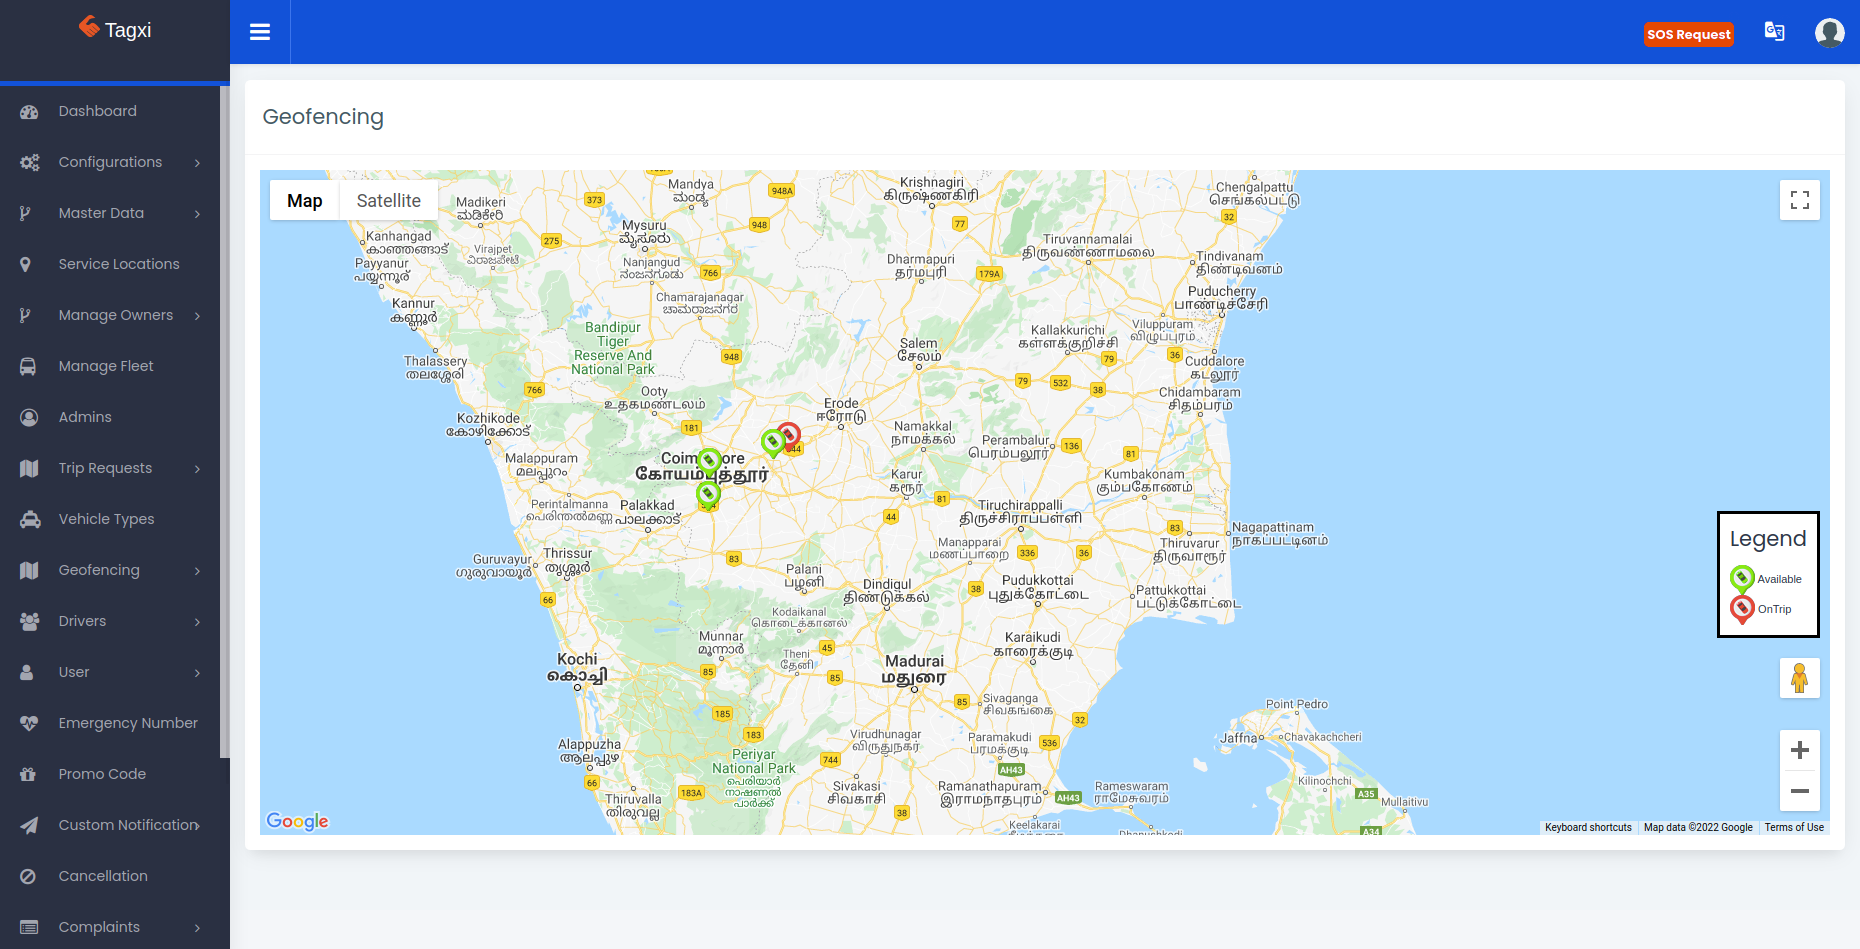
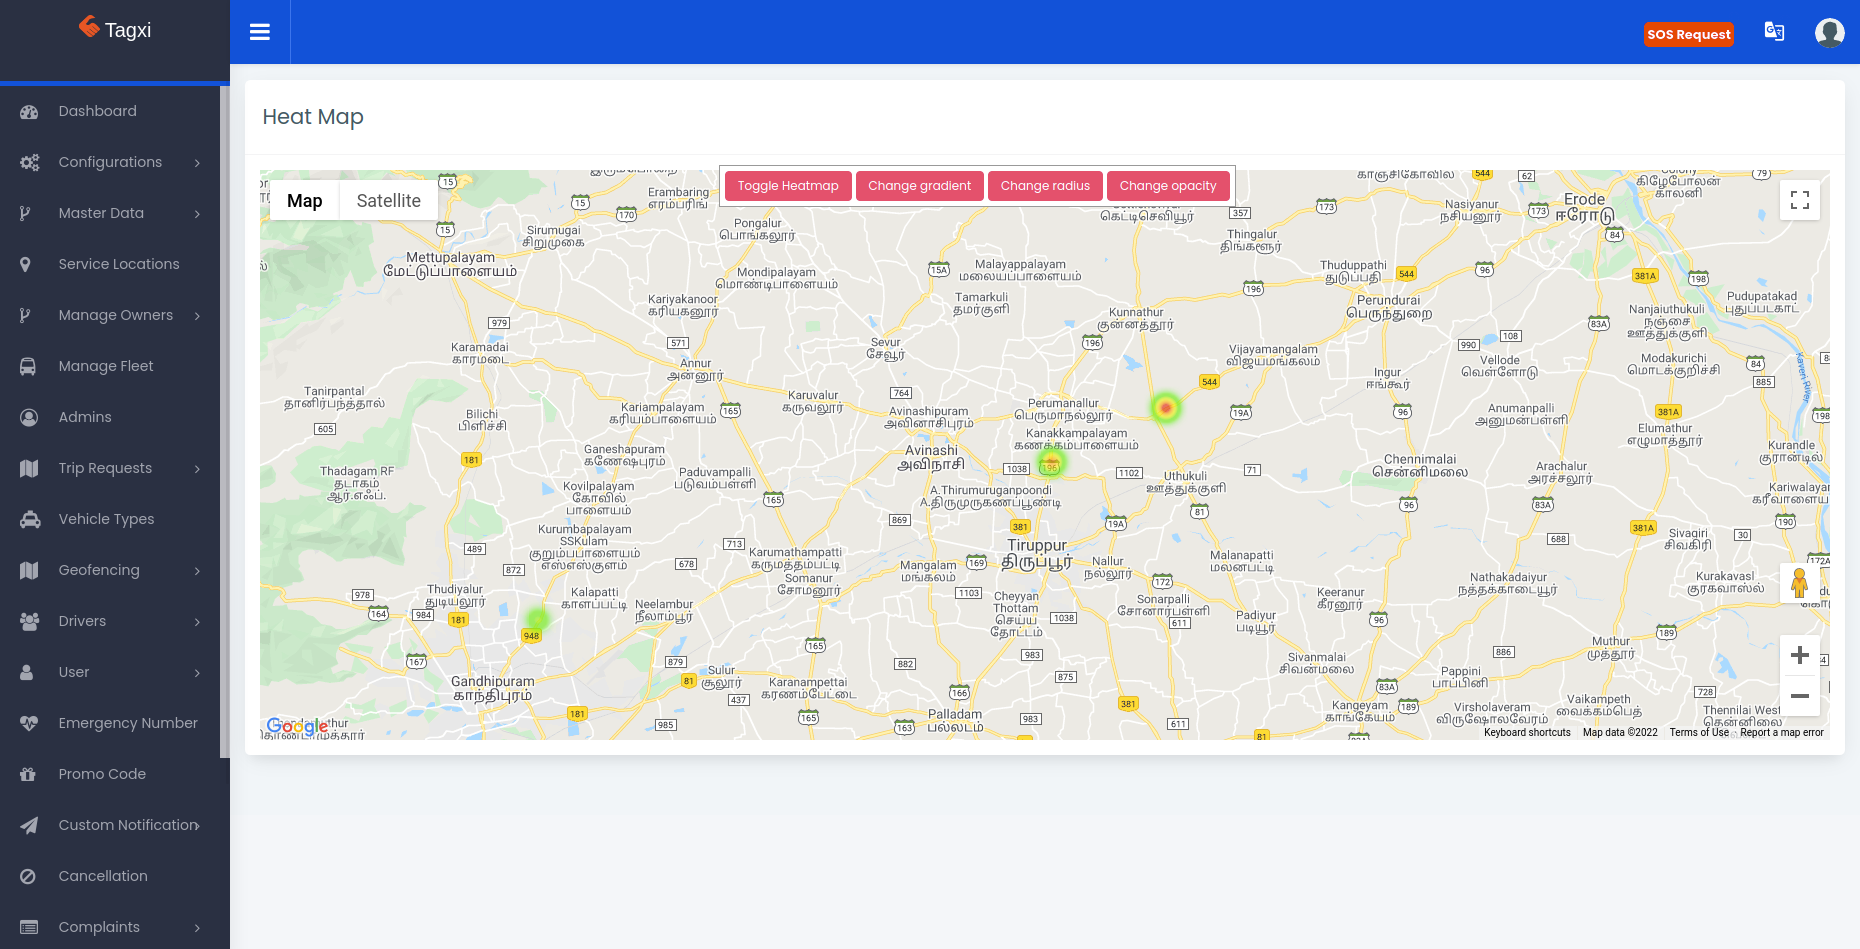
Geofencing view
Under Geofencing view there are two types of view we have developed these are one is God's Eye and another one is heat map.
God's Eye is help us to see how many drivers are available & busy, the driver markers could be updated in realtime using geofire.
God's Eye
Heat Map
Admin,Driver & Users Management
Admin Management
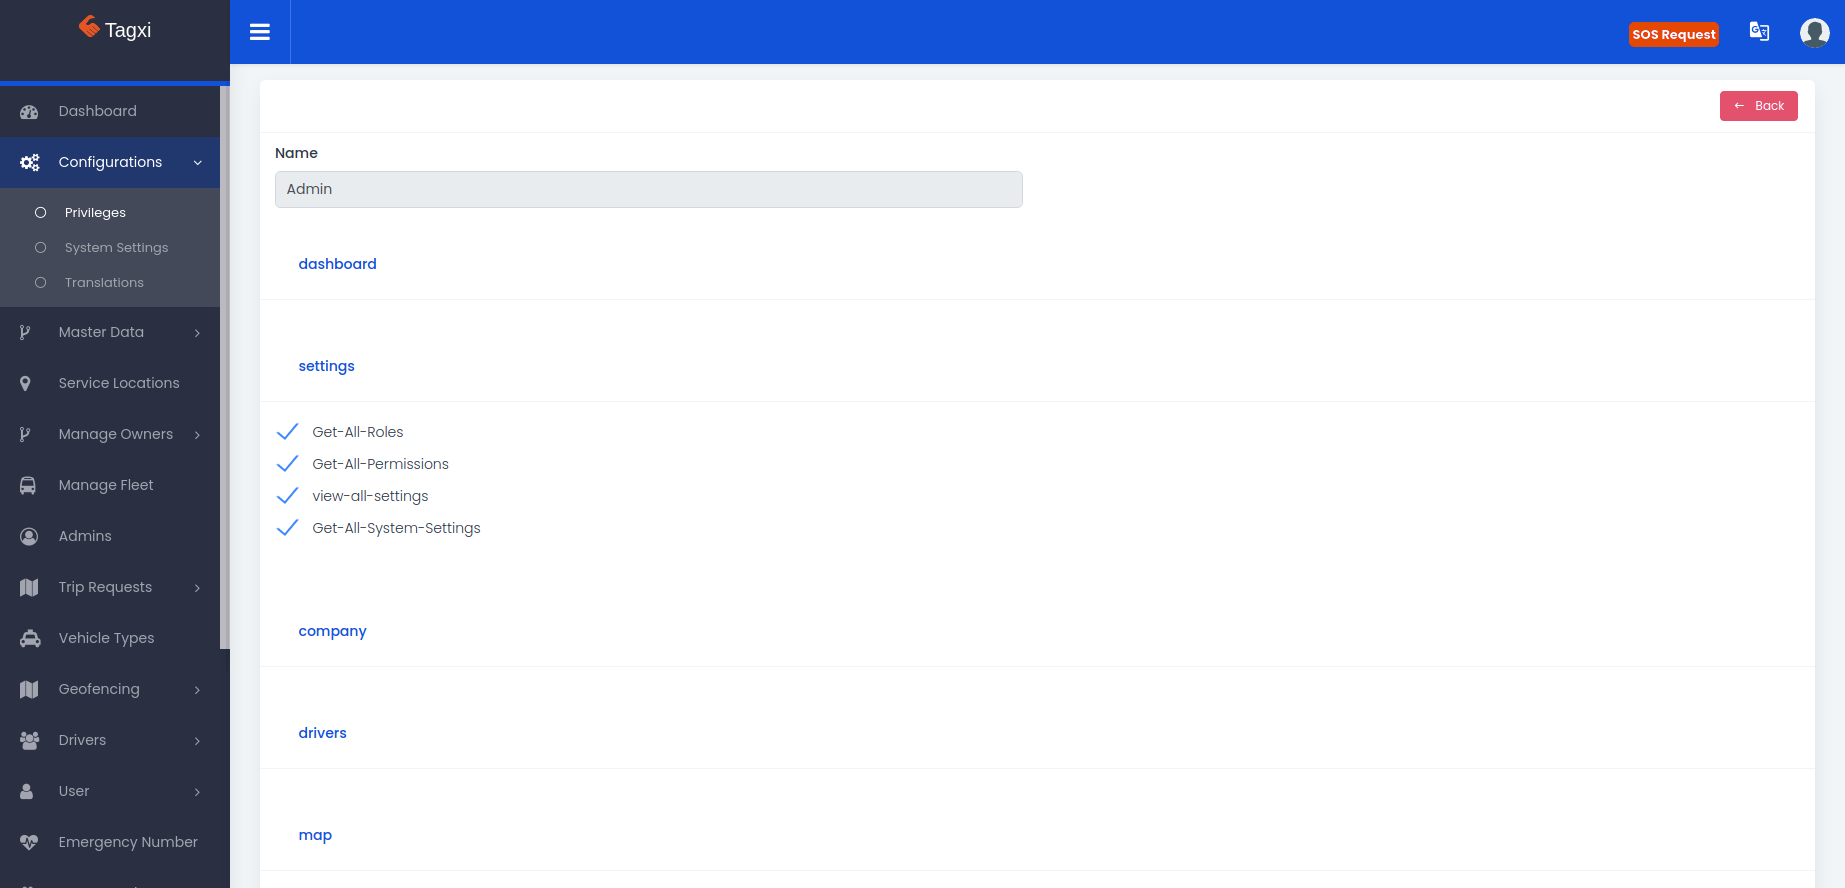
In admin management menu you can create new admin users along with service location. and the super admin can create new super admin users too. And the each admin users can create new admin users with different privileges for the admin roles of our system.
By Using Set privileges option the admin users can set privileges of their admin roles. Please refer the below images.
set-privileges menu Configurations->Roles & Permissions->Actions->Set privilege
User Management
In this menu we can see the list of users who registered and using our our applications. we can edit the user's info and delete the user as well.
Driver Management
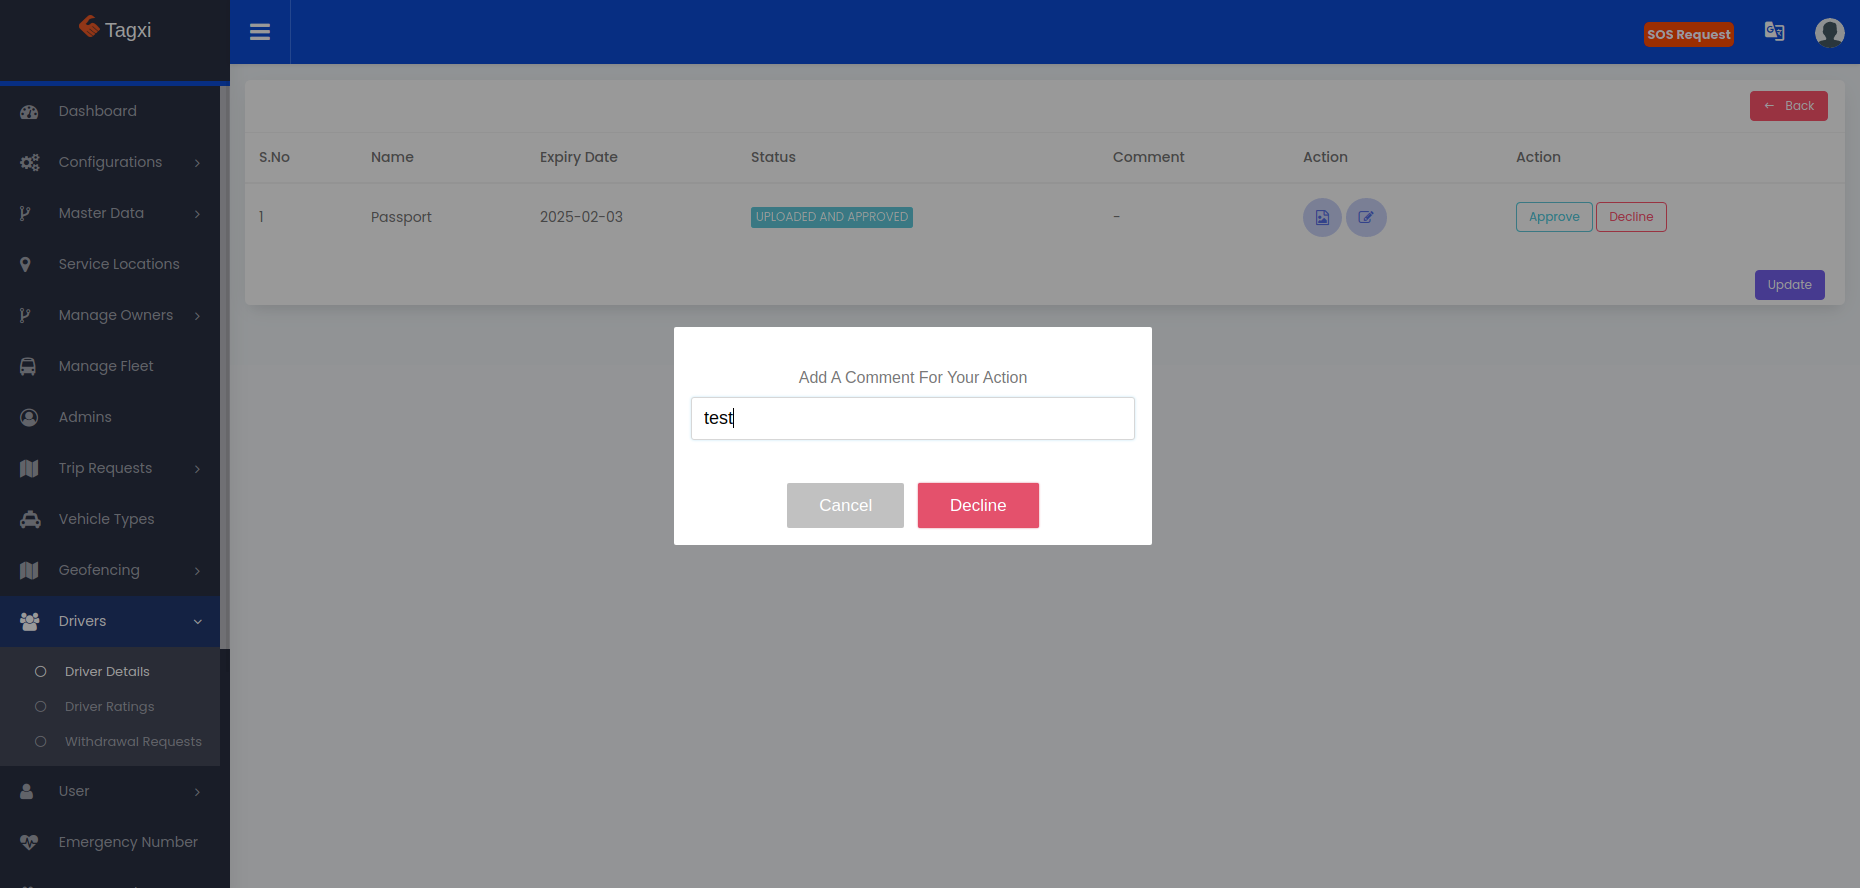
In this menu we can see the list of drivers who registered and using our our applications. we can edit the driver's info and delete the driver as well. There you can see the document view option in the list of drivers, this option is used to manage the driver's documents. Admin users can able to upload and remove the documents of the driver. And the admin can able to approve & decline the driver's document. we can give the comment while decline the driver's document. the decline comments will be listed in the mobile approval screen. Please refer the below images.
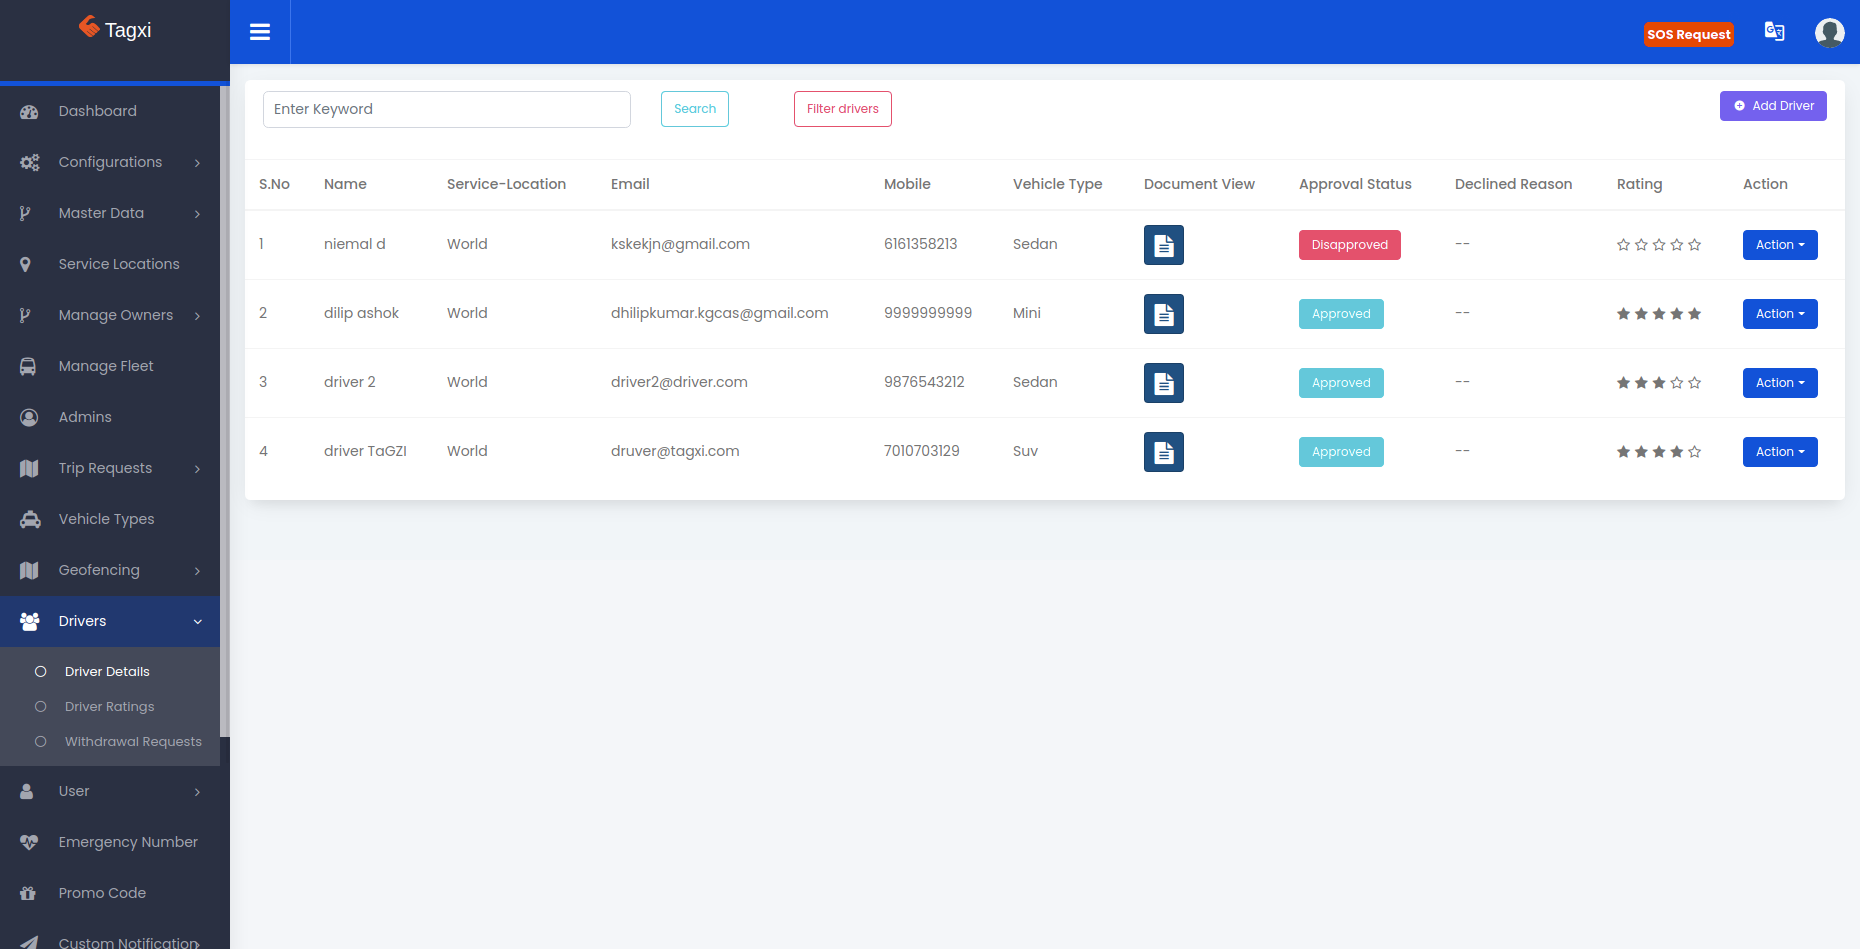
Manage Documents
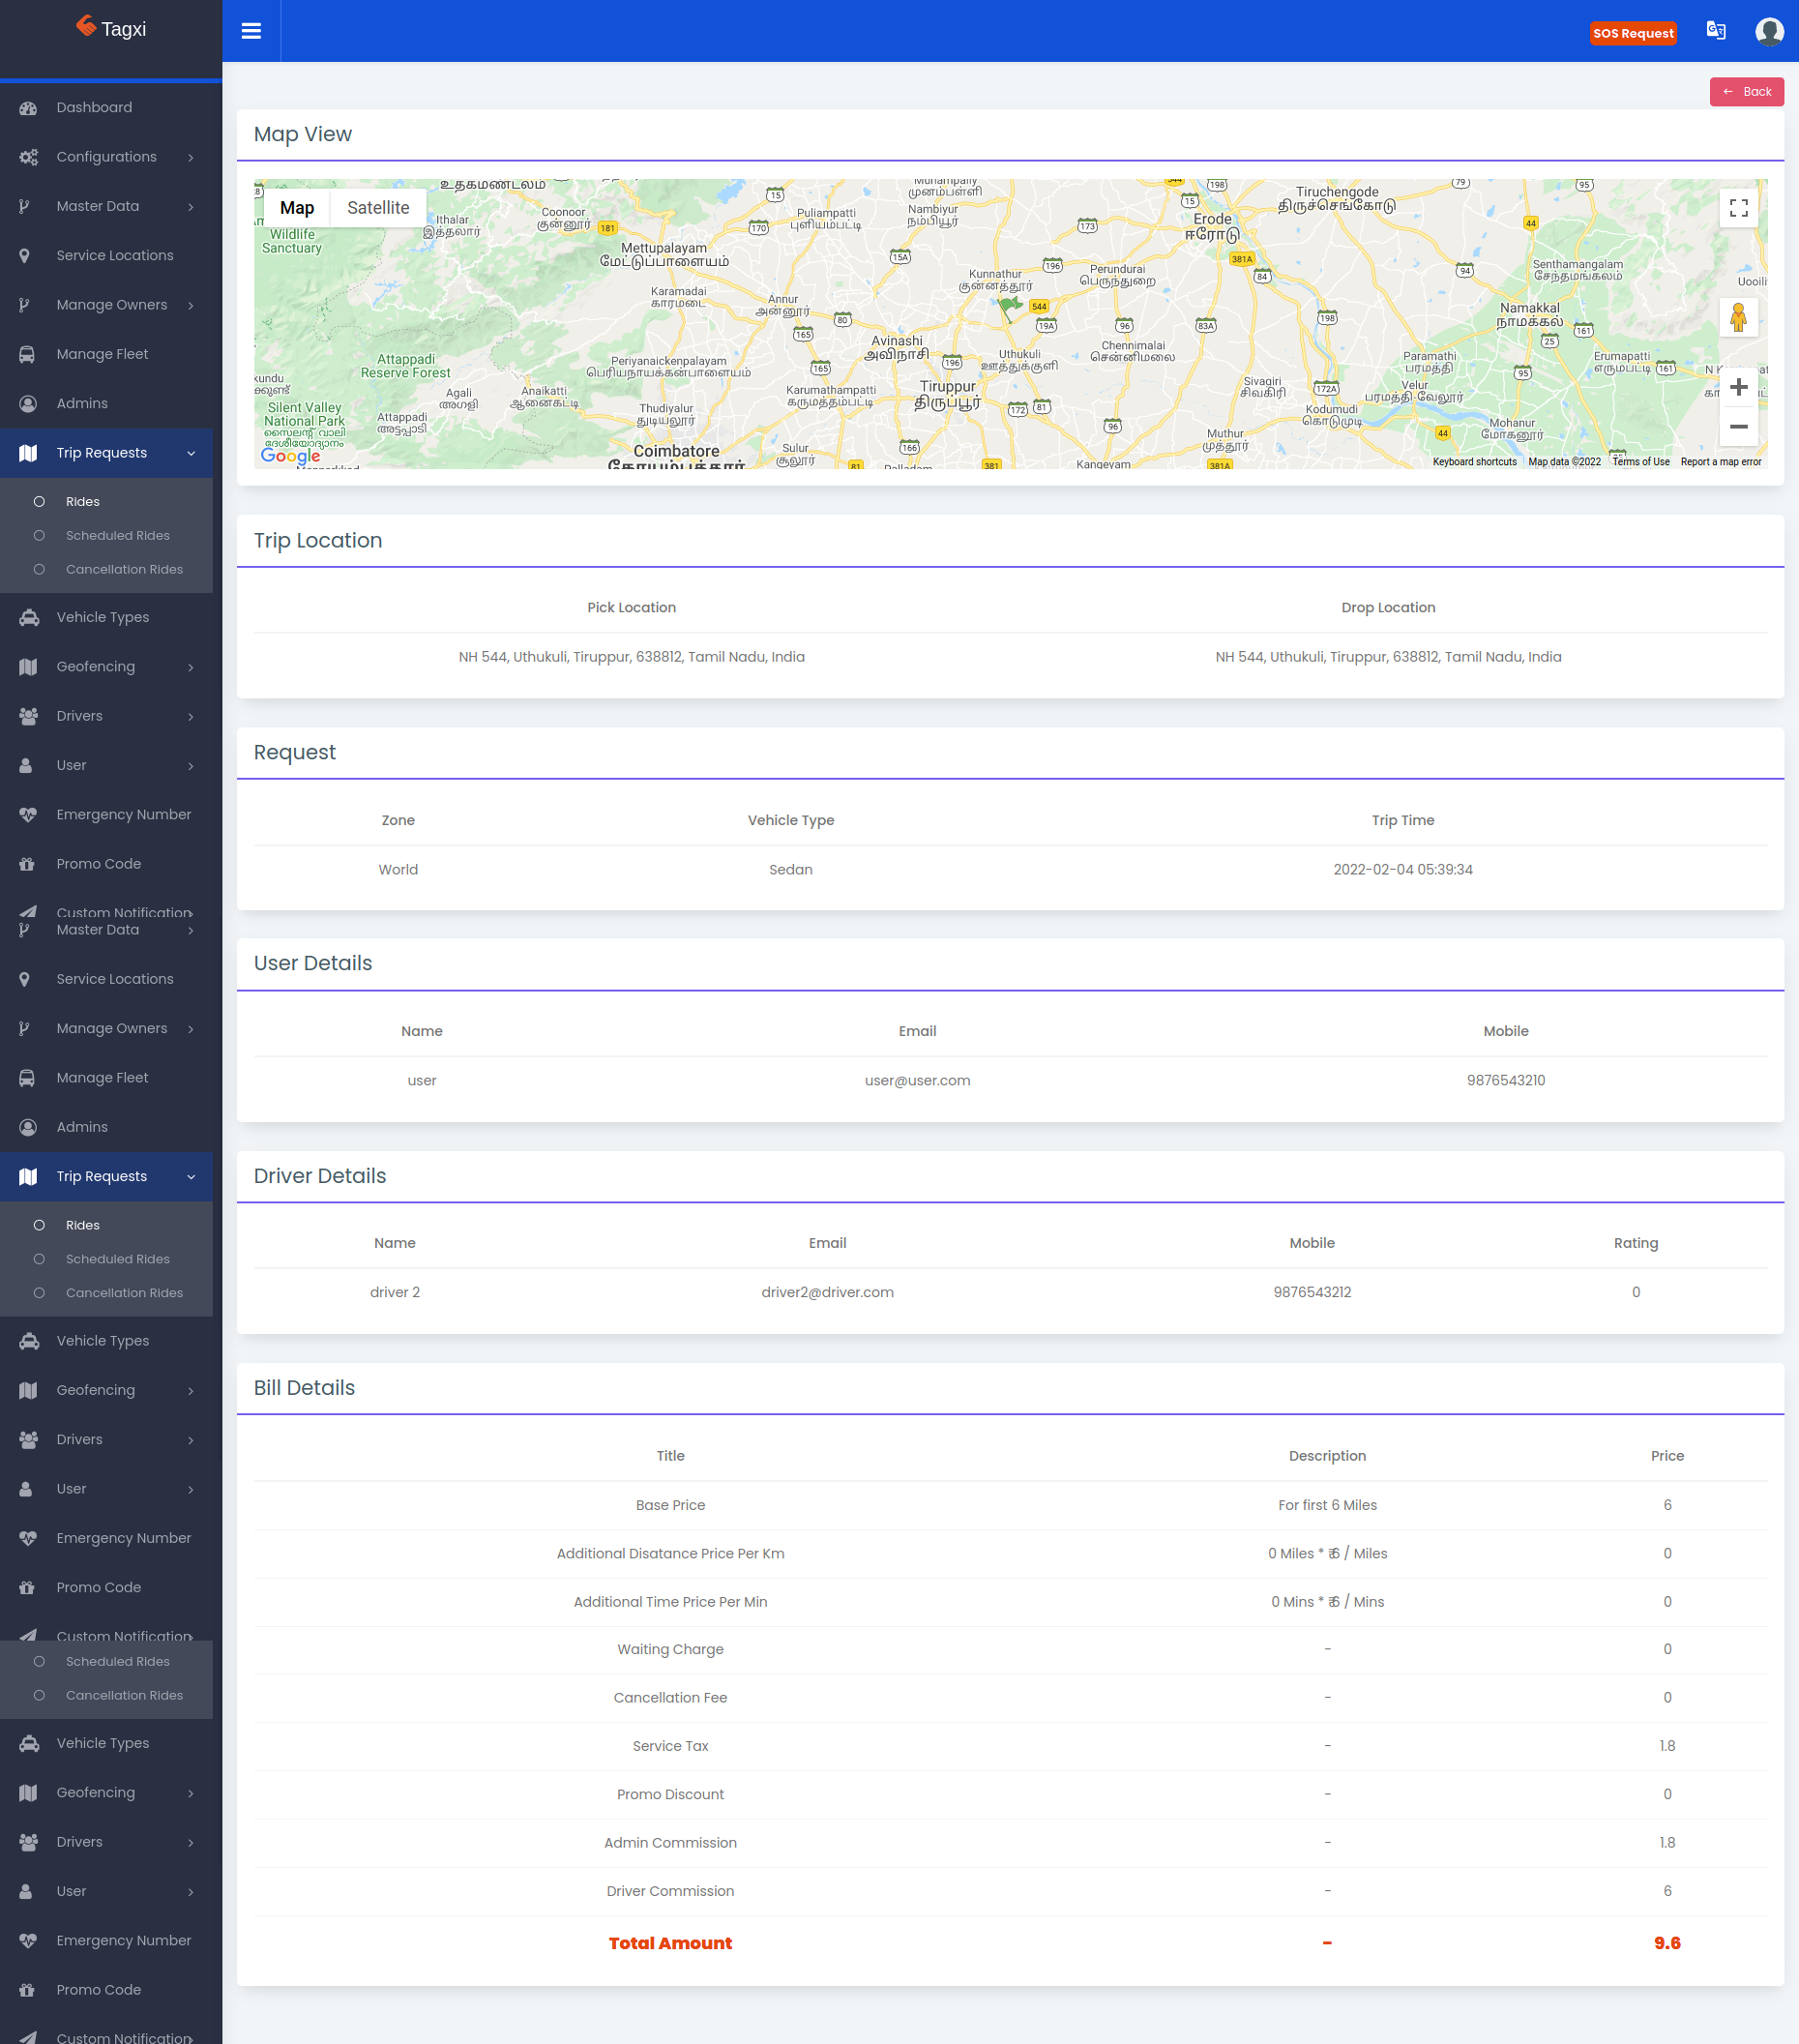
Trip Requests Management
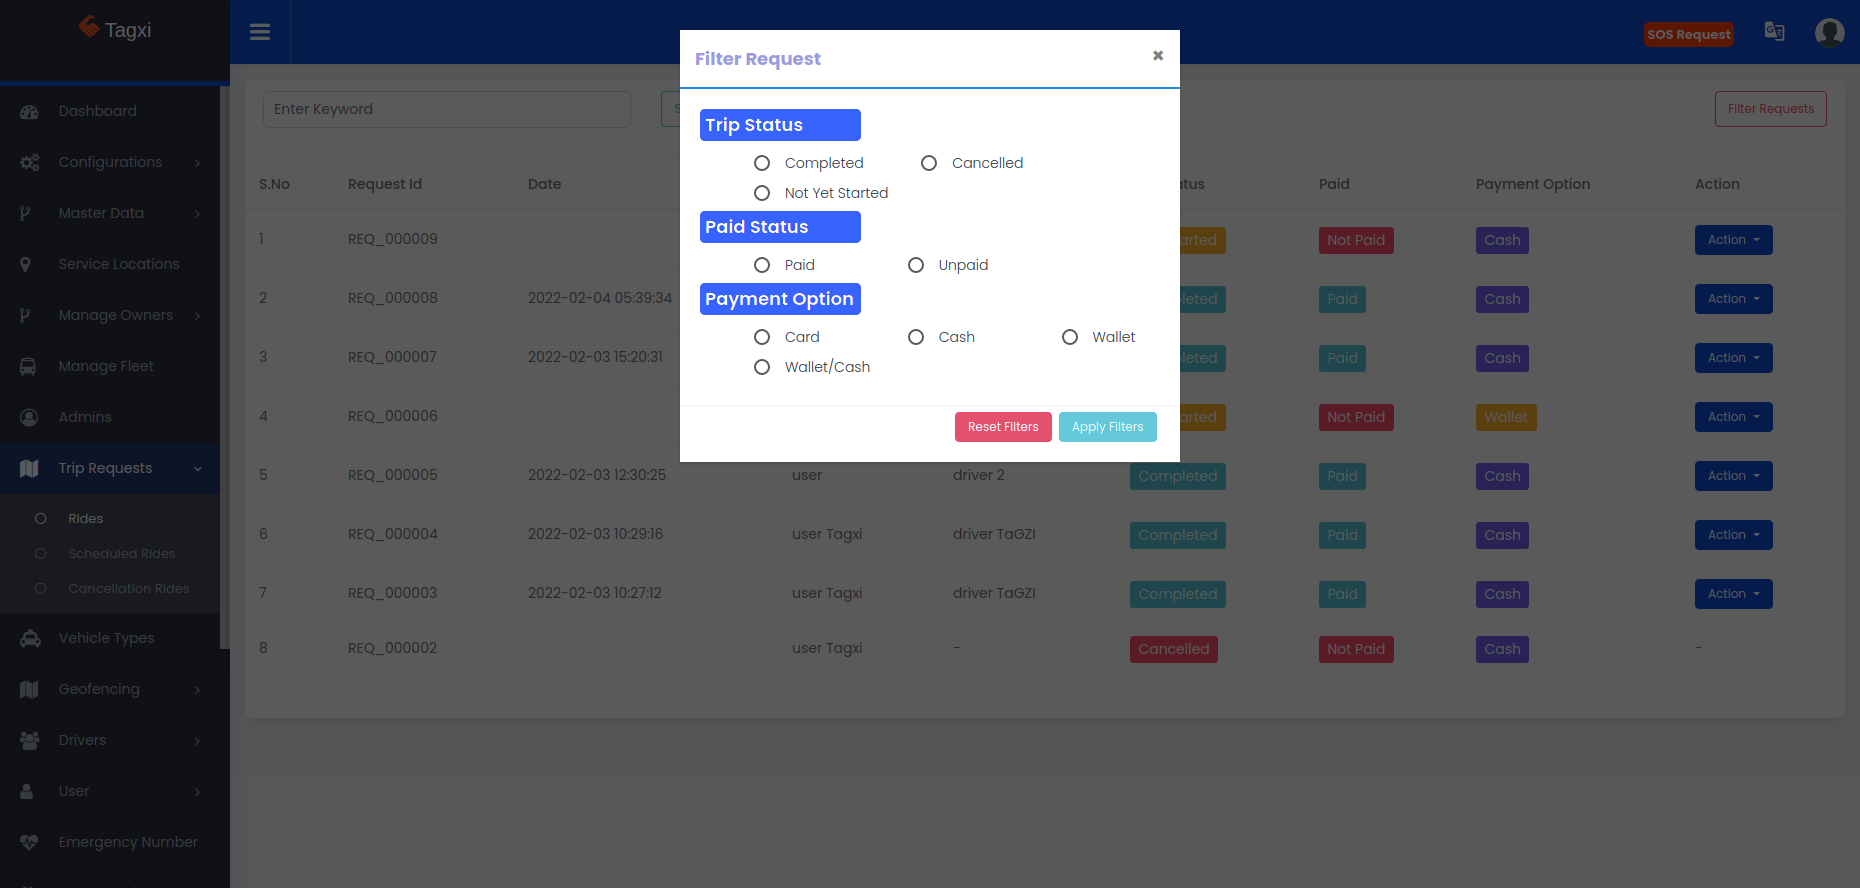
Here you can see the list of scheduled & ride now requests along with multiple actions and filters. By using View action you can see the detailed view of each request along with bill details if the request is completed. Refer the images below.
Requests List
Request View
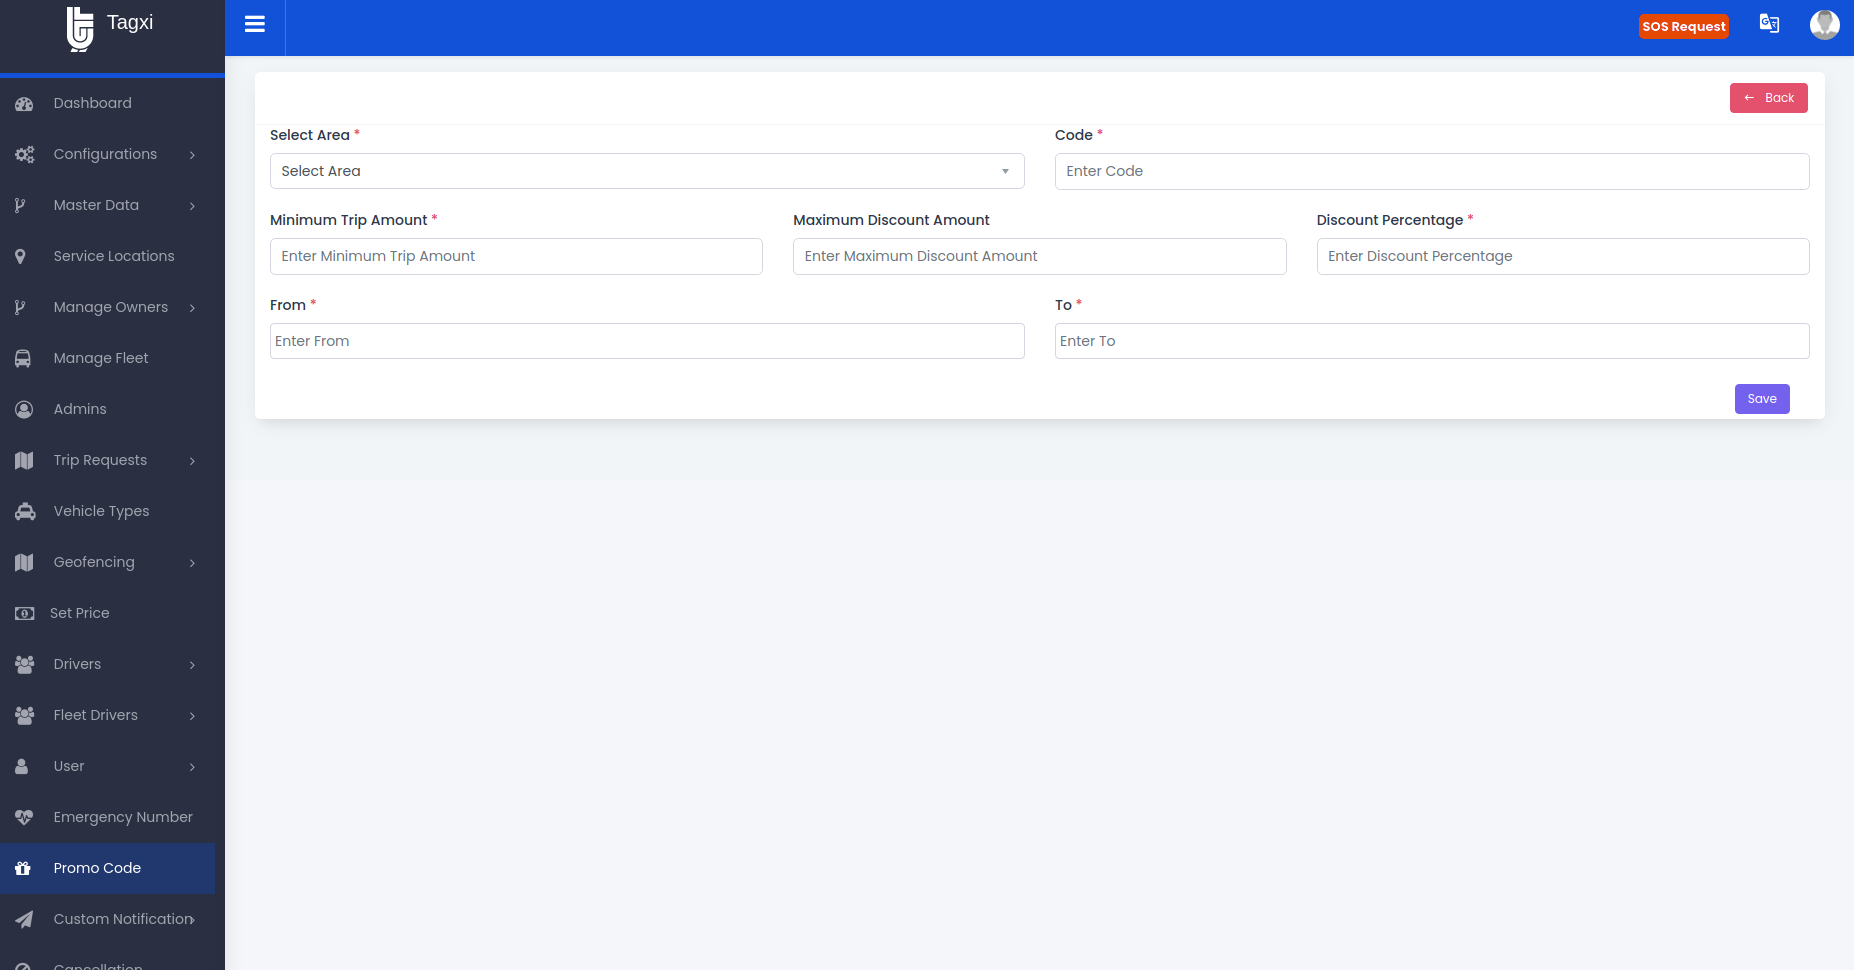
Promo Management
Here you can configure the promo code with expiry dates. please refer the following image. Admin users can able to edit or in active the promo code at any time.
Note: Maximum discount amount field is an optional. if you set the maximum discount amount then the promo would be act like an offer upto option. i.e you can configure the promo as 50% discount upto 200$ like this.
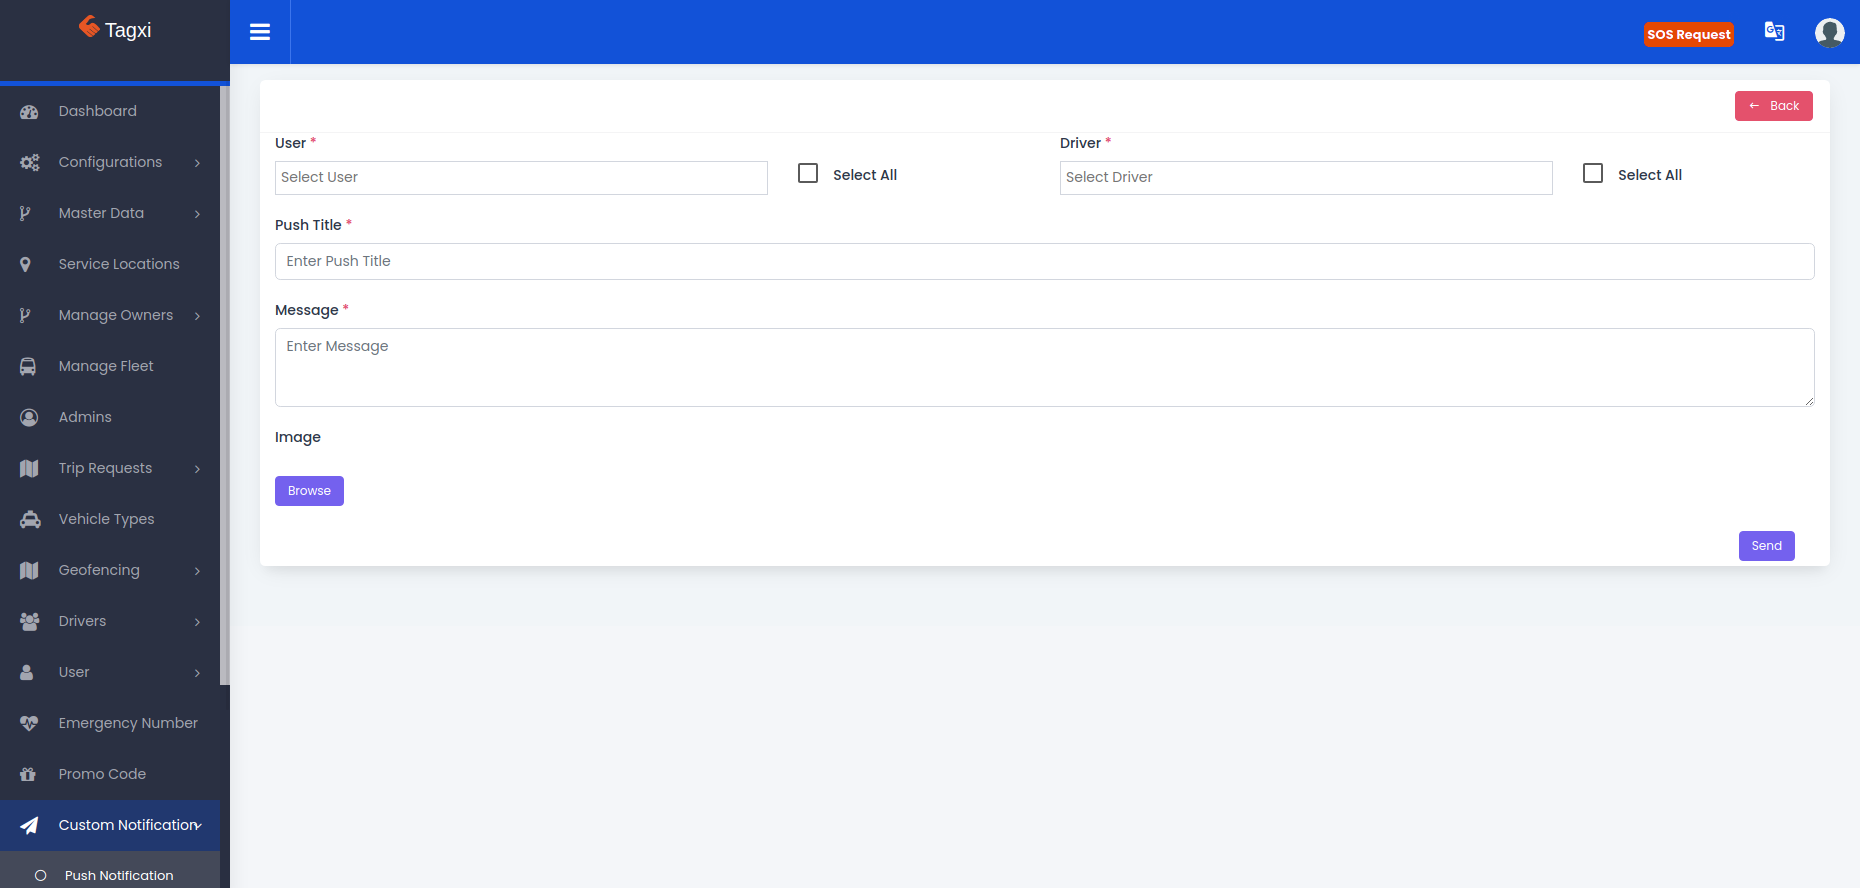
Custom Notifications
By using the custom notification option admin users can able to send the custom push notifications to the users & drivers as well. you can choose a single or multiple users at the same time. please refer an image below to send a notifications to the users & drivers.
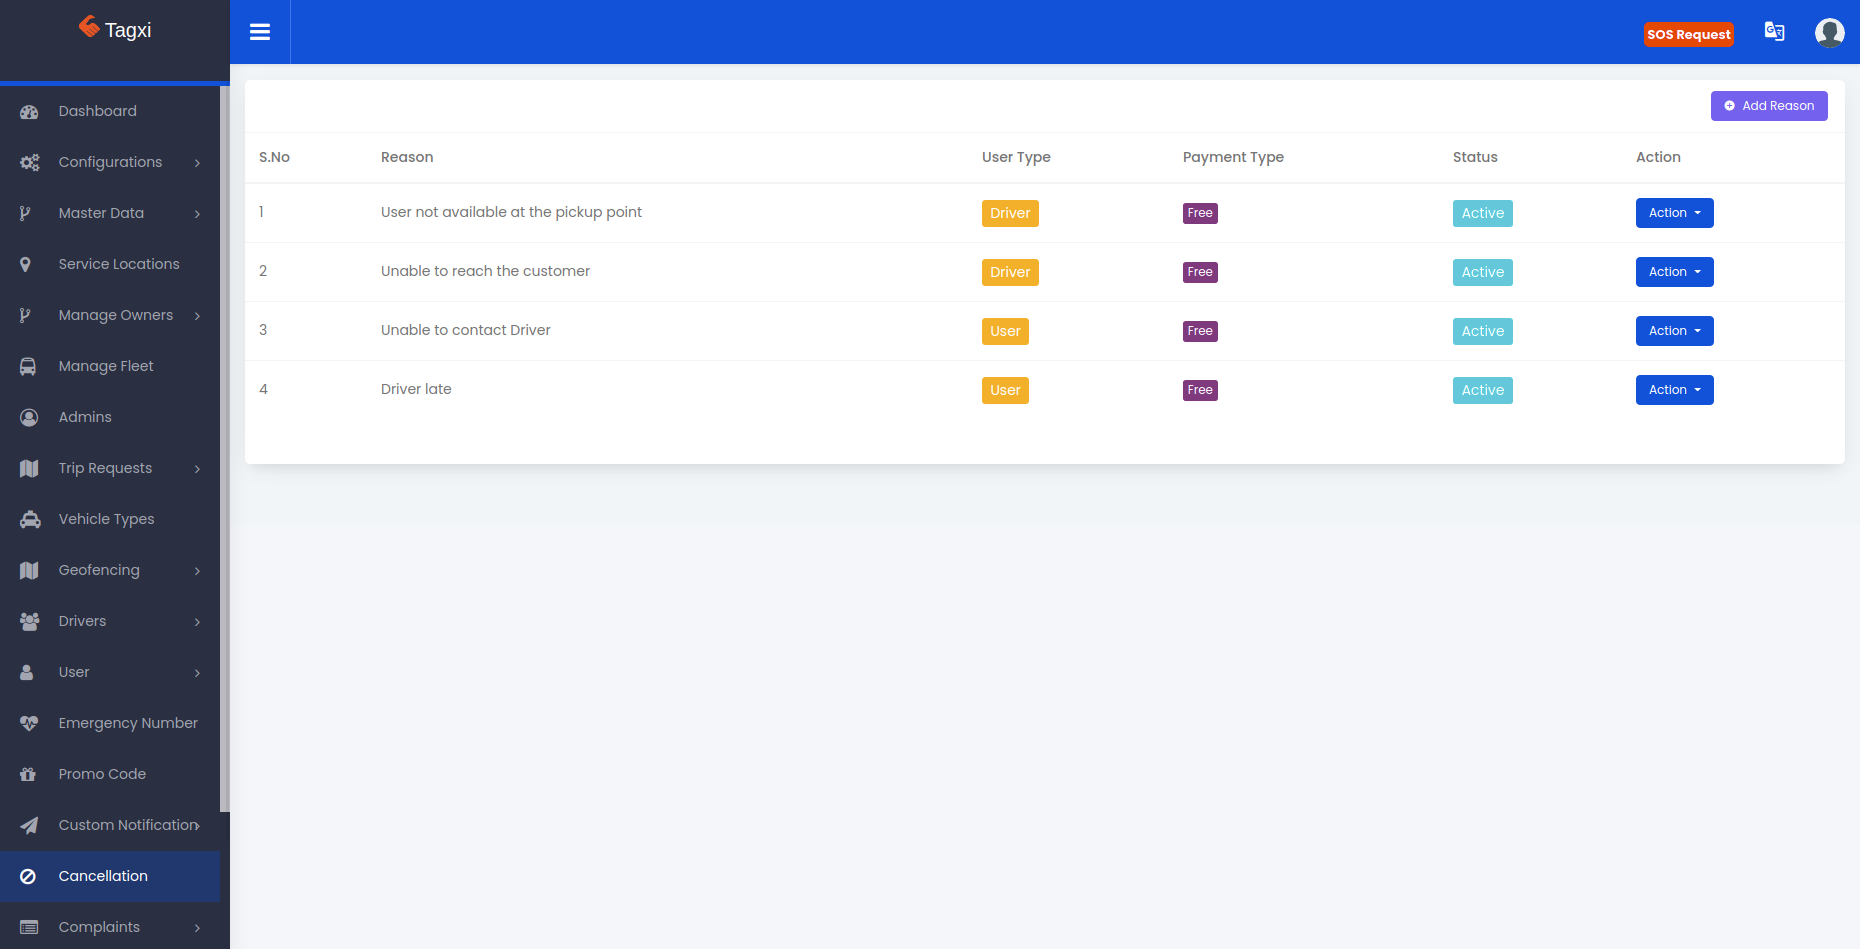
Cancellation & complaints
Cancellation Management
By using cancellation menu admin user can configure the cancellation reasons for both users & drivers with arrival state. And also we can configure whether the reason could be compensate or free. if it is componsate the cancellation fee would be charged for the users & drivers as well.
Complaints Management
Here you can see the complaints list that is raised by the users & drivers from the mobile application. And we can configure the complaints titles at which category they want to rise thier complaints. Please refer an image below.
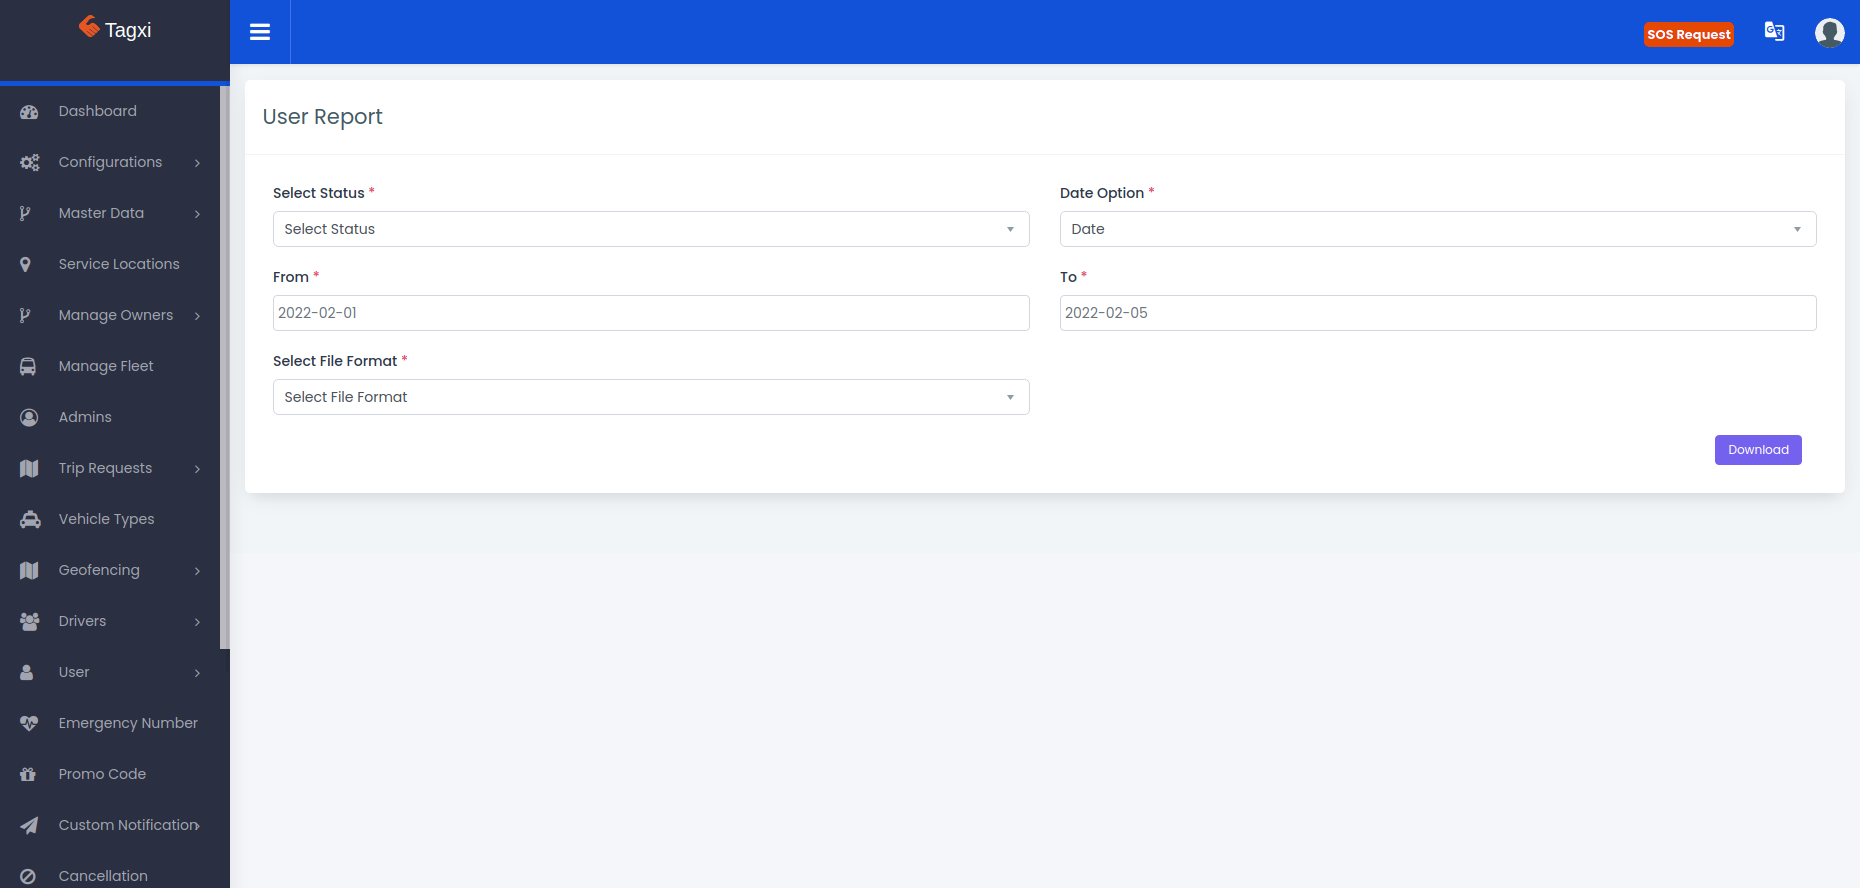
Reports
By using the reports menu admin users can download the travel,drivers & users report along with multiple filters.There you can see the different filters for each reports. Please refer an image below.
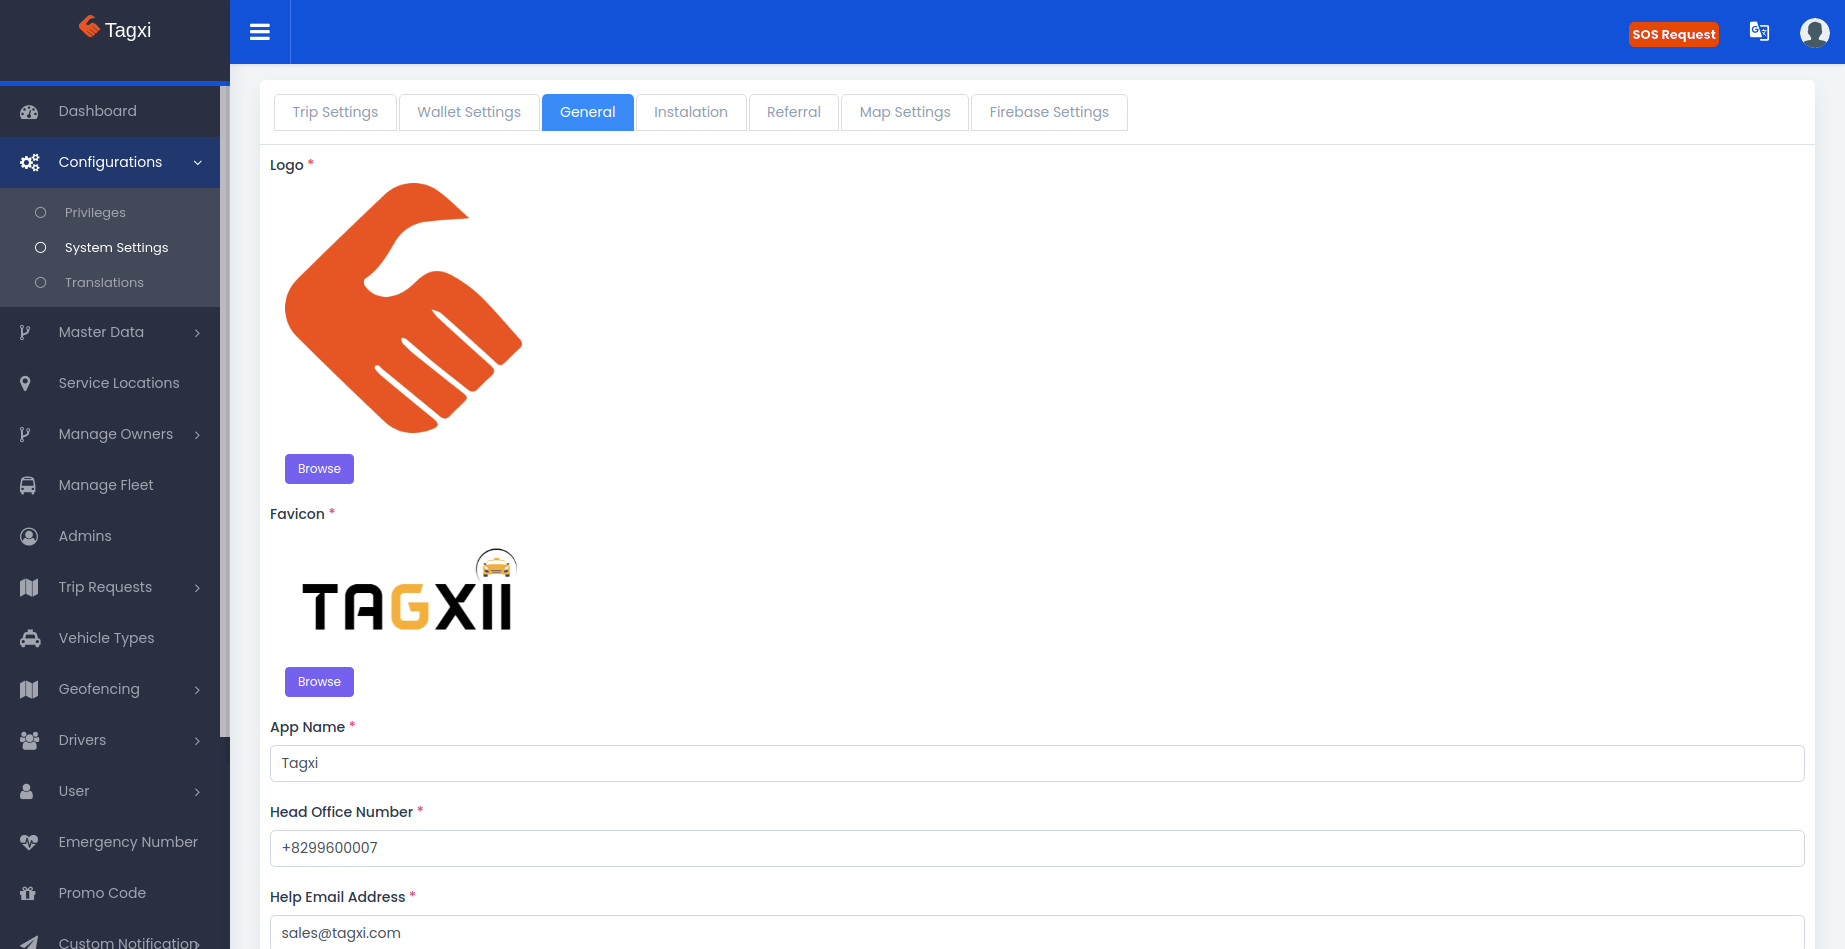
Configurations
By using configurations menu we can configure the total system configurations. There you can see the list of tabs the settings would be categorised like trip settings, installation settings, notification settings & General & Referal settings. Please refer an image below.