Flutter IOS Setup
Introduction
In this article, we are going to set up the Tagxi super bidding App’s initial setup for real-time use cases.
Setup Instructions
Note: Before ios setup, please complete all the server & firebase & code changes, map setup which is mentioned in android setup & server setup sections.
flutter version for this project is 'Channel beta, 3.3.0'
-
change some details in given files,
<strong>Note:</strong> File Location: "project/ios/Runner/Runner.xcodeproj/project.pbxproj"
PRODUCT_BUNDLE_IDENTIFIER = 'your bundle id here'; (change in 3 places in same file)- Note : File Location : "project/ios/Runner/info.plist"
<key>CFBundleDisplayName</key>

<string>project name here</string>
            <array>
                <string>Encoded app id from firebasse</string>
            </array>
- Replace "Encoded app id from firebasse" with the encoded app id of Firebase project

- Open your project File with the Xcode IDE which is used to create the project and also it is very powerful.
project file is in location,
- Note : File Location : "project/ios/runner.xcworkspace"
change map api key in file, Note : File Location : project/ios/Runner/appDelegate.swift
GMSServices.provideAPIKey("your map key here")
Major things to Do
-
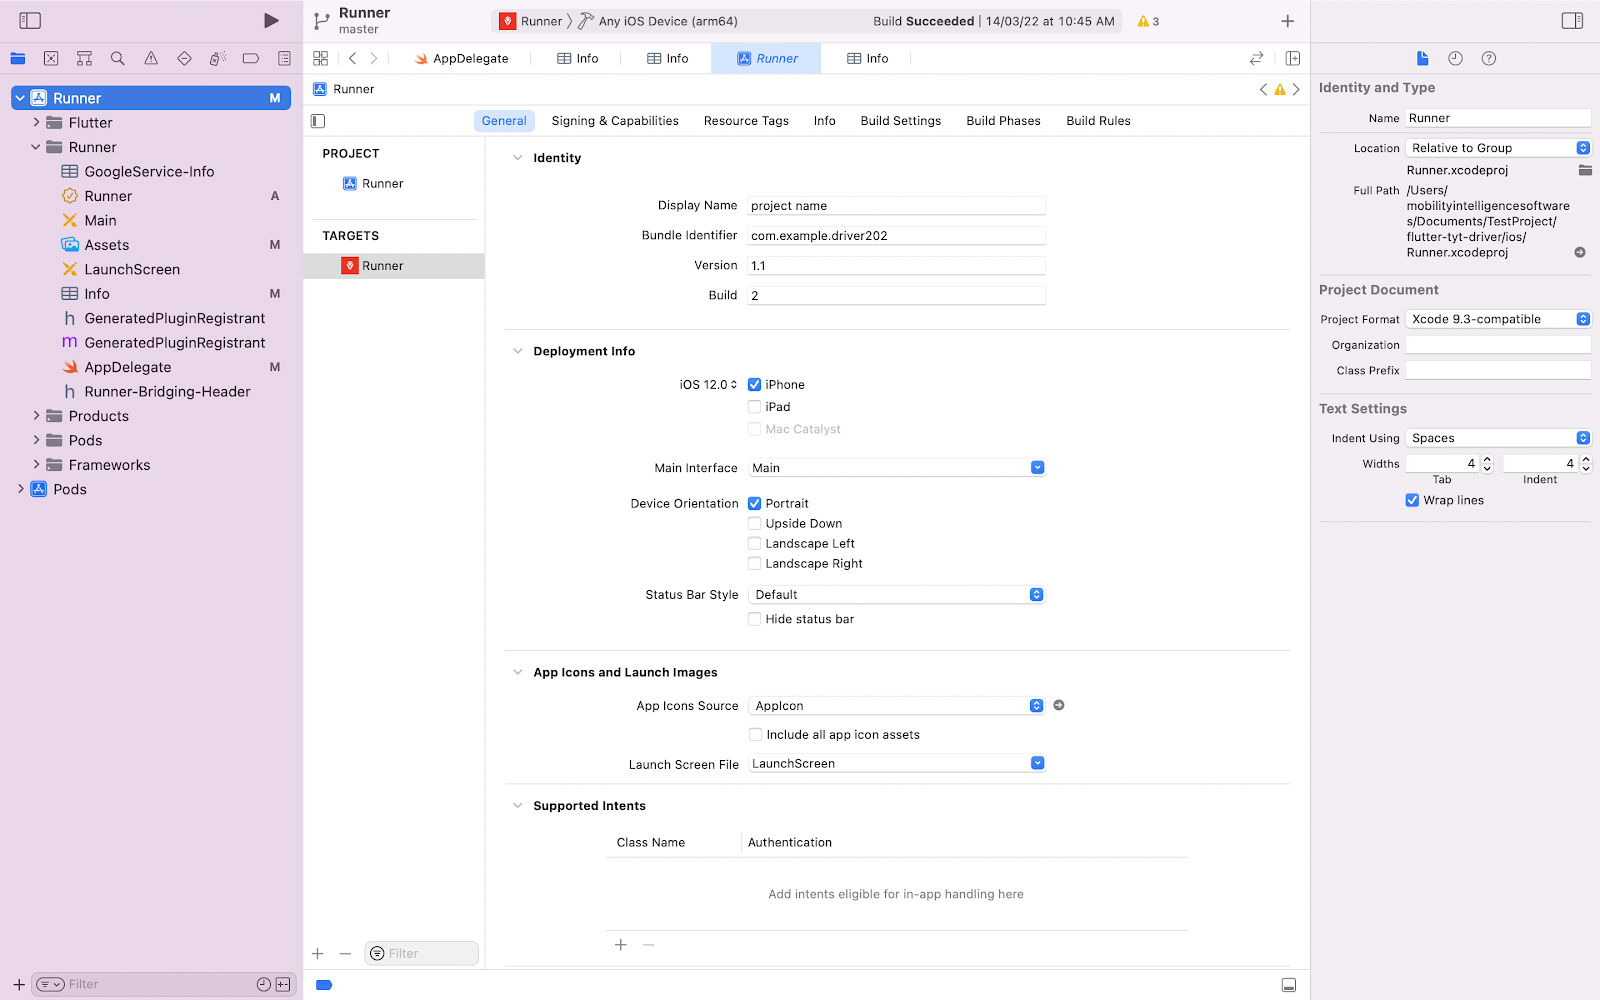
Rename the project with your app name and bundle identifier
in Xcode / Runner / General /
-
Create a bundle identifier for your app in developer account.
-
create development and distribution certificates.
kindly refer this url for reference - https://medium.com/mobile-devops-ci-cd-ct/steps-to-create-ios-developer-and-distribution-certificates-with-and-without-a-mac-8449b973ef9d
-
Create provisioning profiles for both development and distribution. kindly refer this url for reference - https://clearbridgemobile.com/how-to-create-a-distribution-provisioning-profile-for-ios/
-
Create APNS auth key for push notification.
-
Register your bundle identifier in firebase project that you changed in xcode.
-
Firebase -: setup phone number authentication, cloud messaging and firebase database.
-
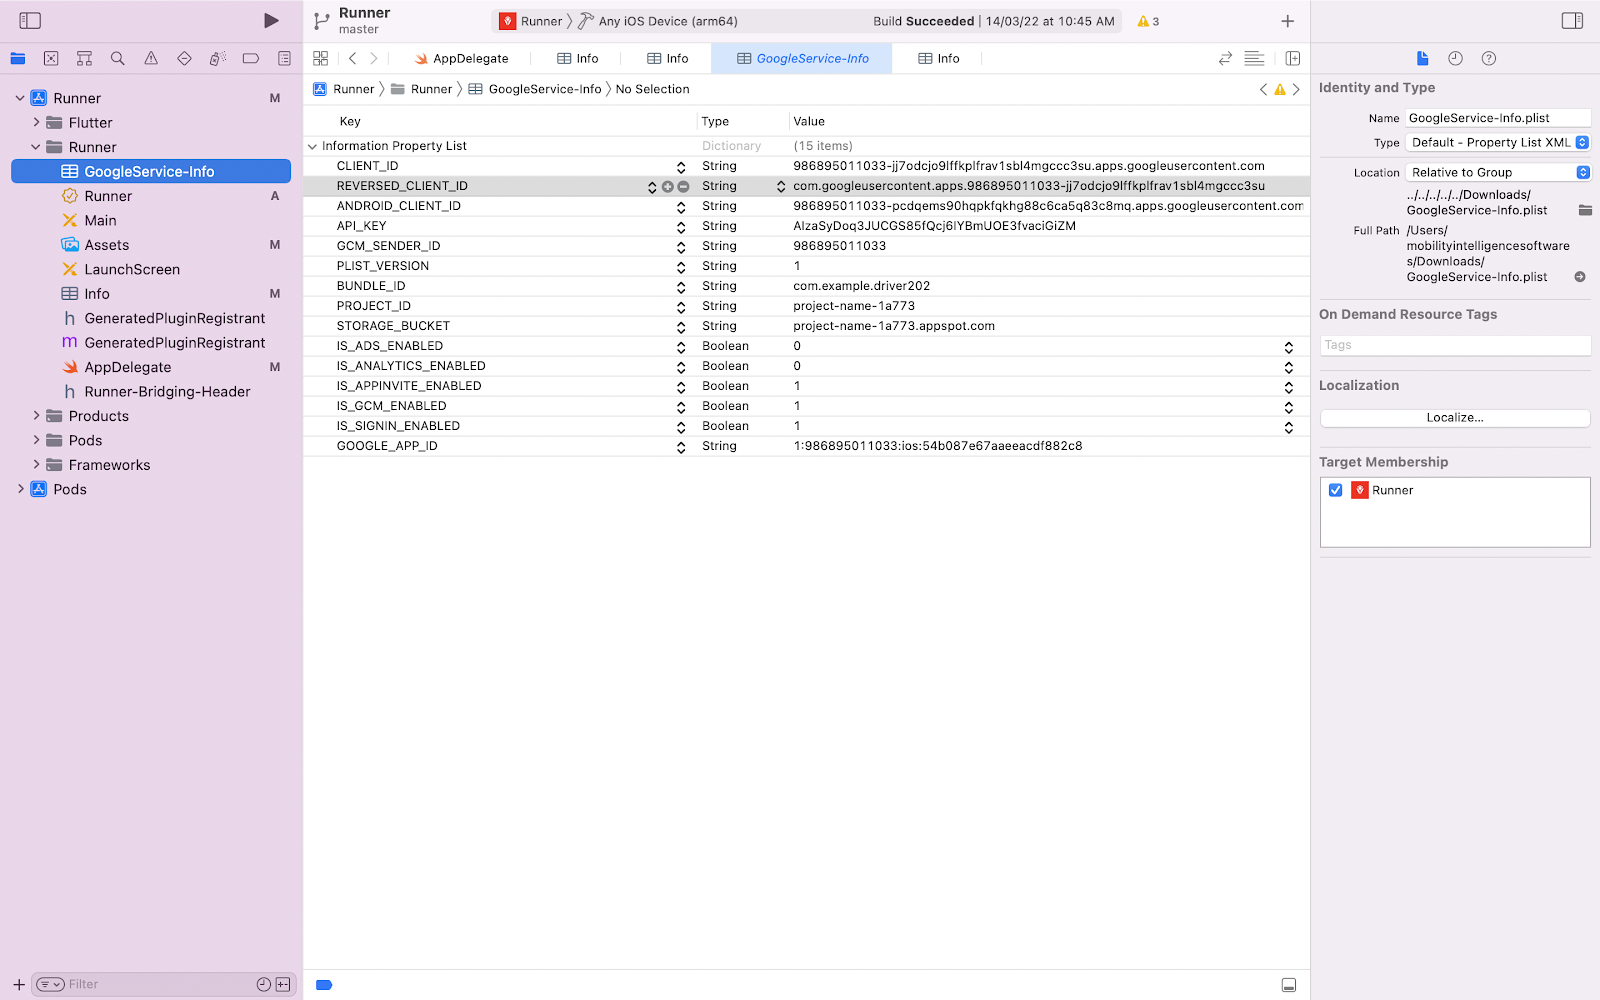
Download the googleservicePlist json from firebase.
-
Now open the project.
-
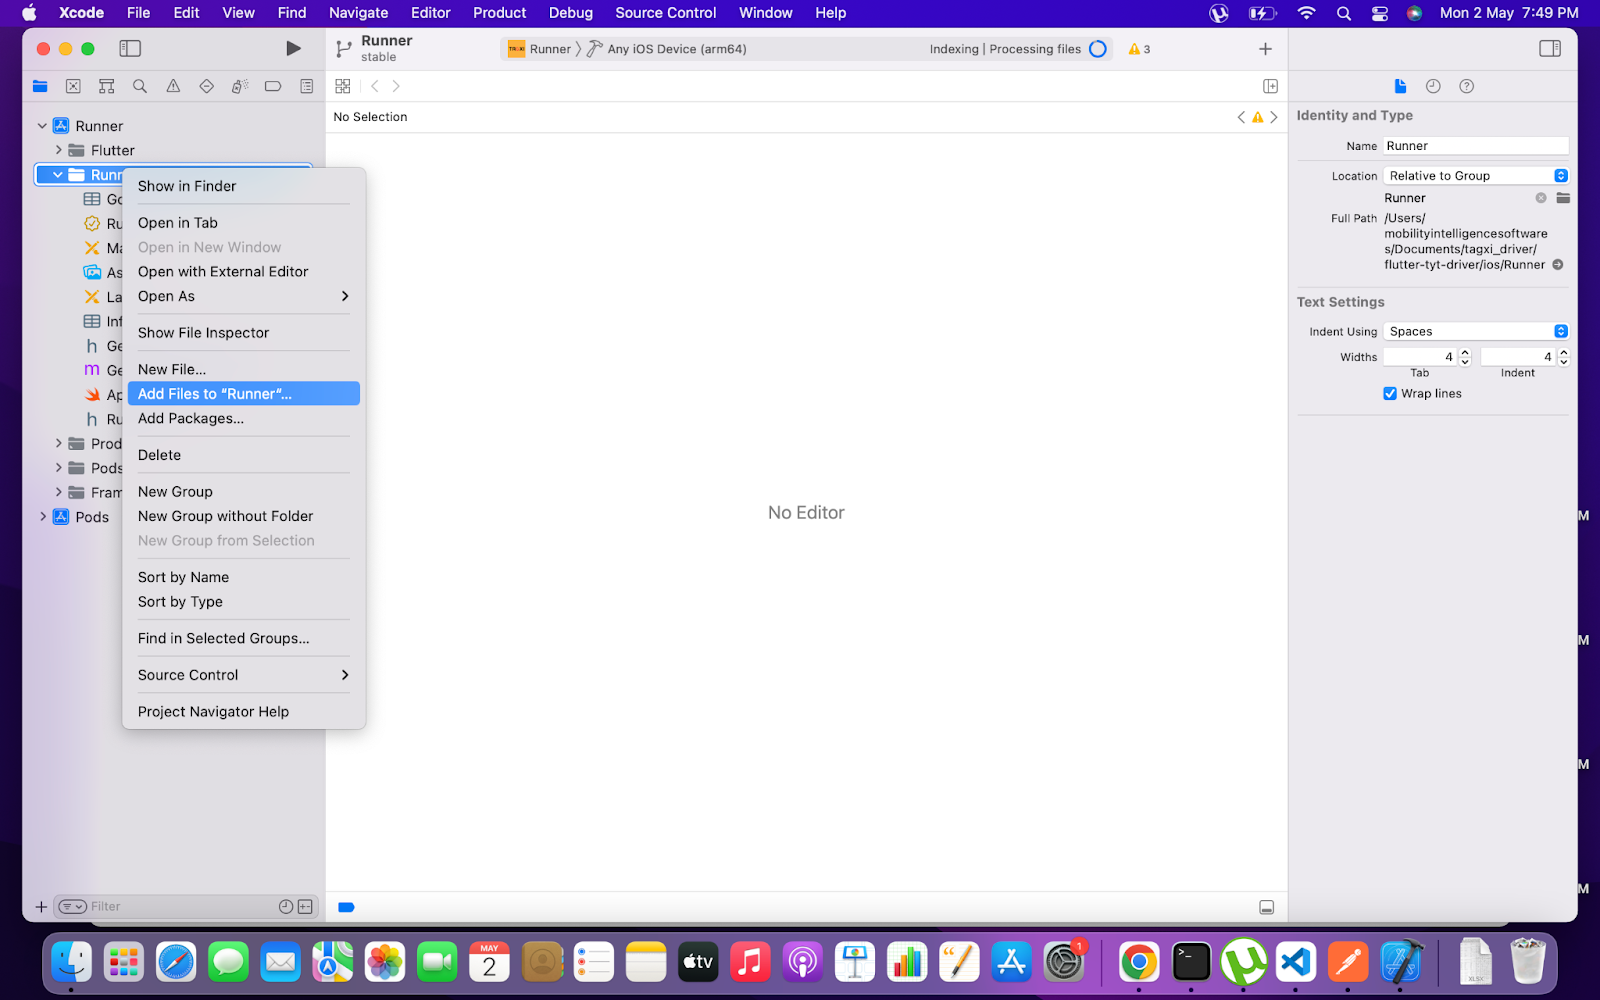
add googleservice-Info.plist in project/ios/Runner/ or from xcode right click Runner and click Add files to runner and choose googleserviceInfo.plist file as shown in image.
-
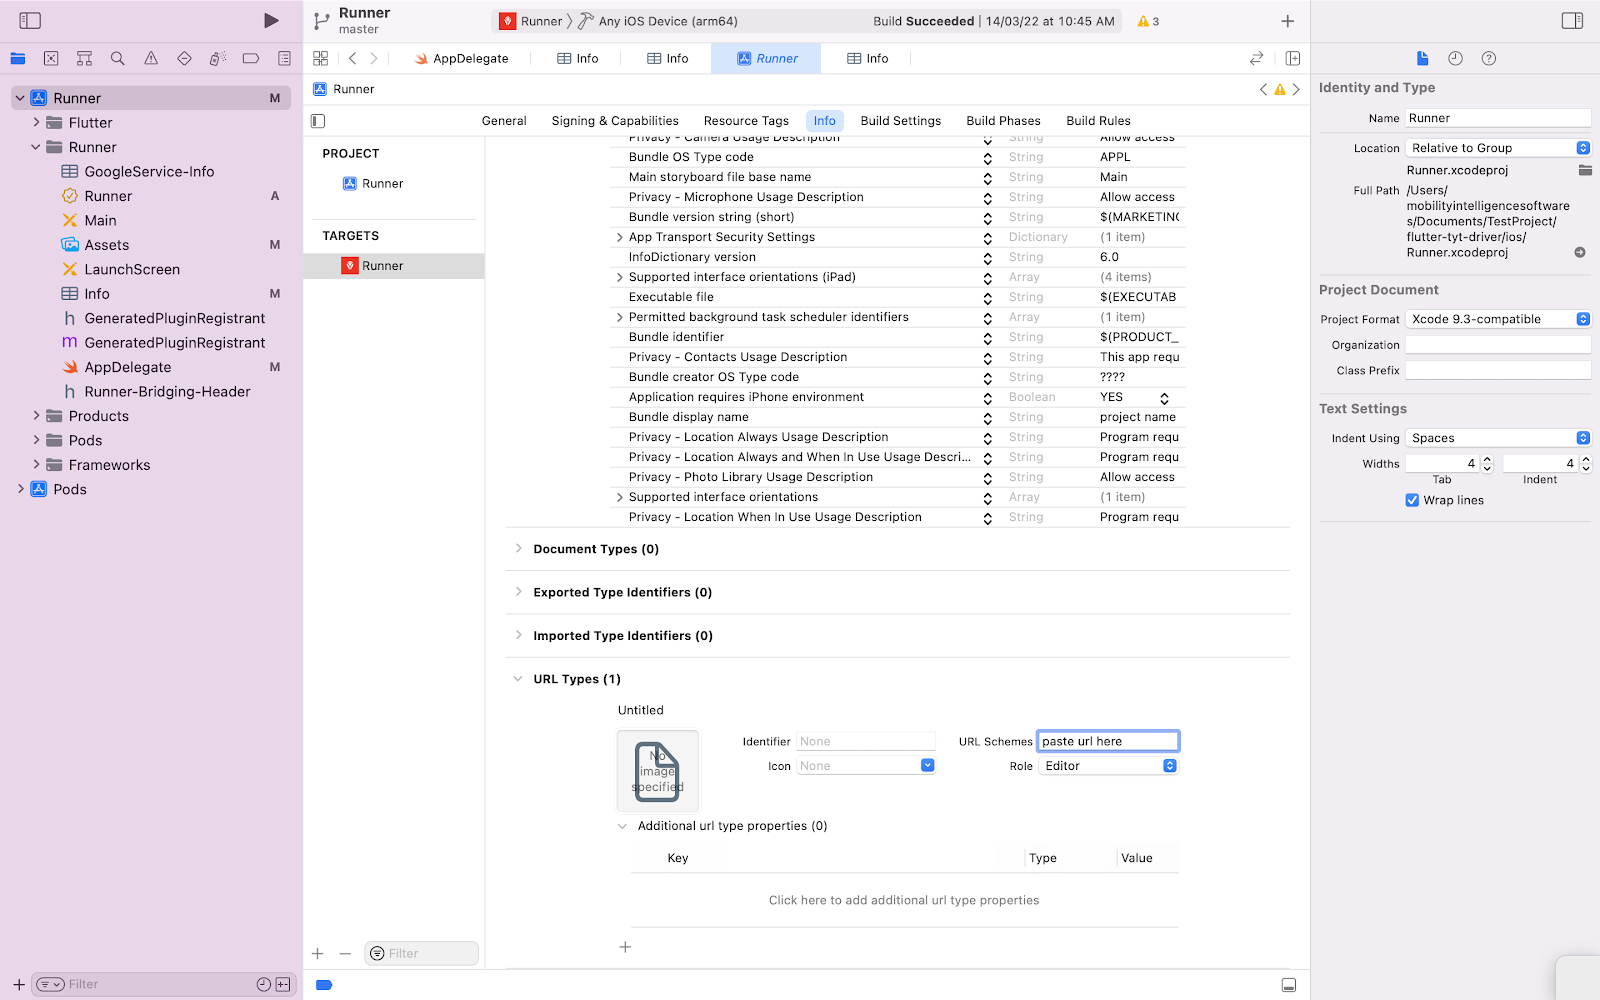
copy the reversed client id from googleserviceplist.json and paste it in url scheme in Xcode / Runner / Info / url types as shown in image
- replace App Icon in assets in the folder in following size and names without alpha and transparent background
project/ios/Runner/Assets.xcassets/AppIcon.appiconset/
 Icon-App-20x20@1x.png - (20x20) x1 size - 20x20

 Icon-App-20x20@2x.png - (20x20) x2 size - 40x40

 Icon-App-20x20@3x.png - (20x20) x3 size - 60x60

 Icon-App-29x29@1x.png - (29x29) x1 size - 29x29

 Icon-App-29x29@2x.png - (29x29) x2 size - 58x58

 Icon-App-29x29@3x.png - (29x29) x3 size - 87x87

 Icon-App-40x40@1x.png - (40x40) x1 size - 40x40

 Icon-App-40x40@2x.png - (40x40) x2 size - 80x80

 Icon-App-40x40@3x.png - (40x40) x3 size - 120x120

 Icon-App-60x60@2x.png - (60x60) x2 size - 120x120

 Icon-App-60x60@3x.png - (60x60) x3 size - 180x180

 Icon-App-76x76@1x.png - (76x76) x1 size - 76x76

 Icon-App-76x76@2x.png - (76x76) x2 size - 152x152

 Icon-App-83.5x83.5@2x.png - (83.5x83.5) x2 size - 167x167

Icon-App-1024x1024@1x.png - (1024x1024) x1 size - 1024x1024-
in go to folder 'project/ios' and run command 'flutter build ios'
-
to create archive file to upload run command 'flutter build ipa' from folder 'project/ios'.
you will find archive file in folder project/build/ios/archive/Runner.xcarchive